19 February, 2005
UNDER CONSTRUCTION
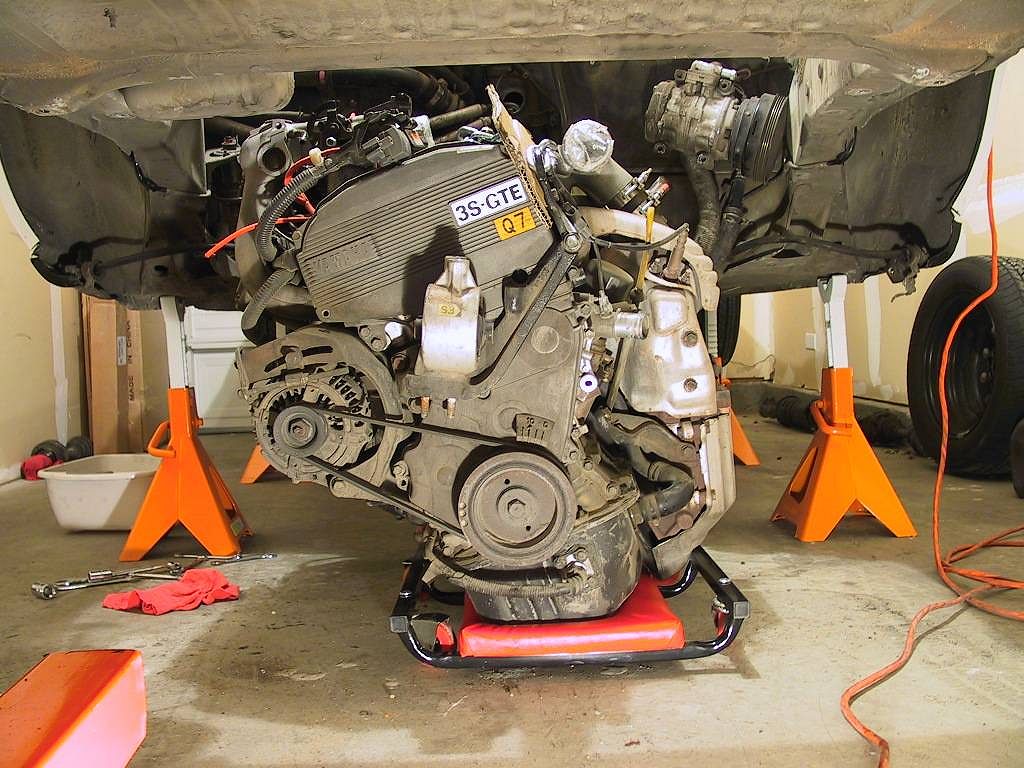
Overview: Upgrading the 3SGTE
Little did I know how long this project would stretch out. It took a full year before I had my turbo kit! I used that time to collect parts I thought I would need to build it up the way I wanted it.
This project can be divided into three parts: removing the engine, rebuilding the engine, and installing the engine. The BGB, while not without errors, is a valuable resource and should be at your side during this process. Trying to do any type of work on the MR2 without consulting the BGB will likely lead to frustration and possibly disaster. While imperfect, it's better than most other service manuals I have worked with.
Remember that this is only a guide -- not gospel. What you do to YOUR vehicle is YOUR responsibility. I do not endorse, approve, authorize, or otherwise encourage you to make alterations to your vehicle. Be careful, and recognize the dangers associated with modifications to your vehicle's critical systems, like electrical, engine, brakes, etc.
Like any project, planning is essential. And like most projects I've undertaken, my planning could have been better. Determining all the required parts in advance, having them on hand, tracking them so you can find them when you need to, these are all tasks that I could have done better. As a result, I have a few suggestions:
-
Make sure you have a plan to identify parts as you remove them. I used a system of small boxes and small parts bags. I made the effort to label the bag and the box at the same time the part was removed, as specifically as I could. McMaster-Carr is an excellent source for small parts bags. Cheap insurance against hours of searching.
-
Take digital photos of everything as it is removed. As I look back on the photos I took, I can't believe all the hoses there are on the stock motor. Even with all those, there are still a few shots that I don't have, and they would have simplified the assembly process.
-
When you get new parts from Toyota, take the time to identify where they go and what they do. Having a bunch of plastic parts bags with cryptic part numbers on them can be frustrating.
-
Track the part numbers you order. This can save you from duplicating the parts, especially when the project is spread out over a period of time. You never can tell when you'll get interrupted for several weeks, or even months, and searching for a part when you are not even certain you ordered it can be time consuming and frustrating.
-
I think it's false economy to re-use gaskets, seals, o-rings, belts, and hoses. Considering the amount of labor and inconvenience involved if they later fail, it just doesn't seem worth the small savings to me.
I don't list torque values, not because they are not important but precisely the opposite -- they are important enough that I'm reluctant to provide values that might be incorrect. The BGB should be your source, but use common sense, as the BGB has errors as well. The BGB does include "standard" torque values for standard-size bolts, and these are useful as general guidelines. For example, if the BGB advises you to use 60 foot-pounds on a 10mm nut, find a confirming source. It's likely you'll end up with a snapped stud or, worse, a stripped hole.
These pages have LOTS of photos. That's really the whole point in creating this guide. Owner's manuals are often lacking photos, or they have a small, fuzzy, B&W photo that doesn't quite show that crucial detail you need to see. All images can be viewed full-size (1024 x 768) by clicking on the smaller image. The full-size view can often provide that extra level of detail necessary to clarify the operation. I could be accused of including more photos than necessary (especially on relatively simple tasks), but my philosophy has been "it's better to have it and not need it, than need it and not have it".
I use the photos as a reminder to myself. I often get interrupted during a project and can't return to it for days, even weeks. The photos can prove invaluable when trying to remember what I've done.
Some of the photos might not exactly match the sequence of the text, as I may have used photos from previous projects that I felt better illustrated the task at hand. So the car in the photo could be white or red, but the task was the important thing.
Please contact
me if you have comments or suggestions about the article or the
project, or if you find errors on these pages.
Parts and Preparation
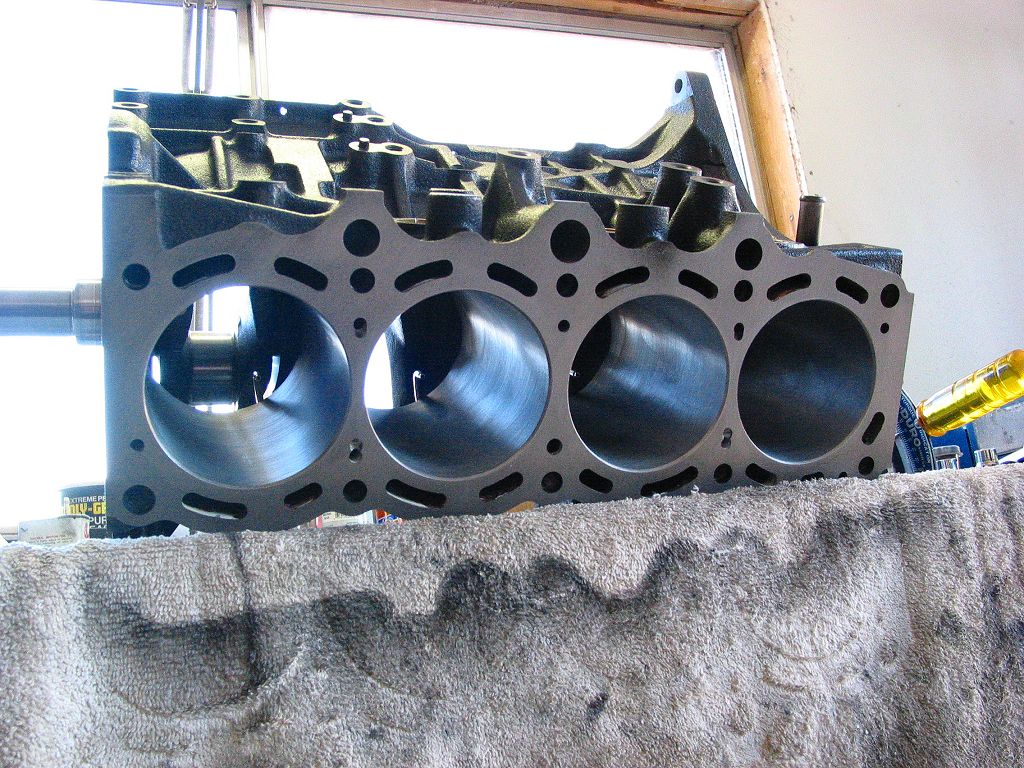
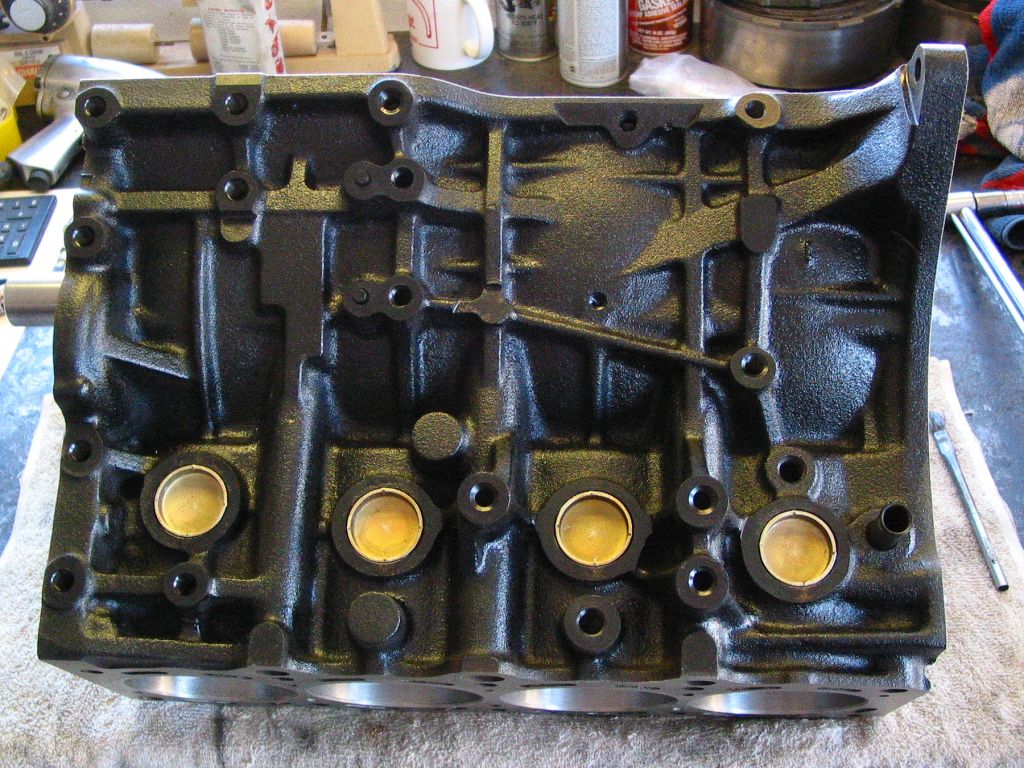
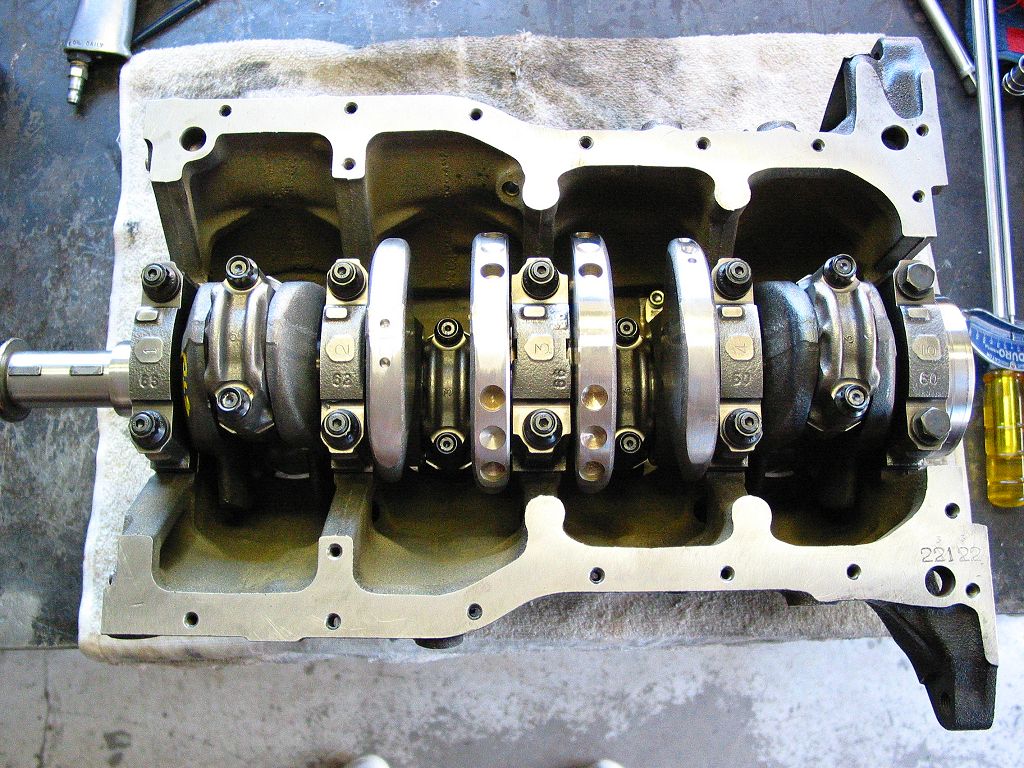
Short Block
Blueprinted, balanced,
ARP main studs.
Engine blueprinting and assembly performed by Alex Labeur.
Engine machine work performed by Vegas Machine.
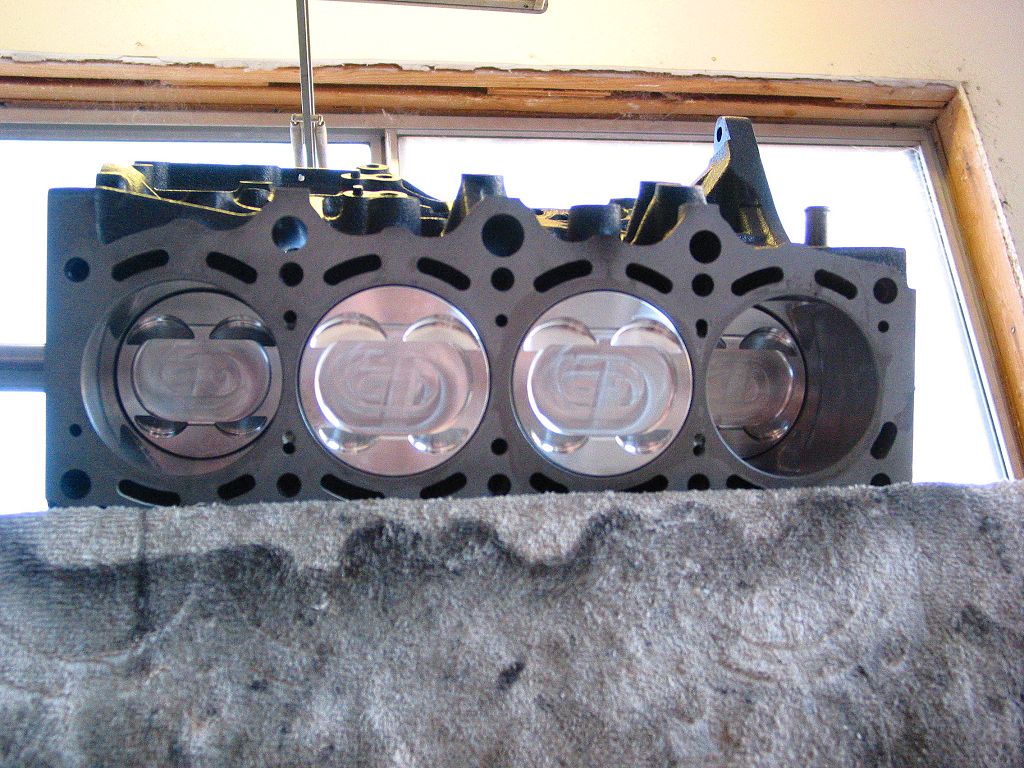
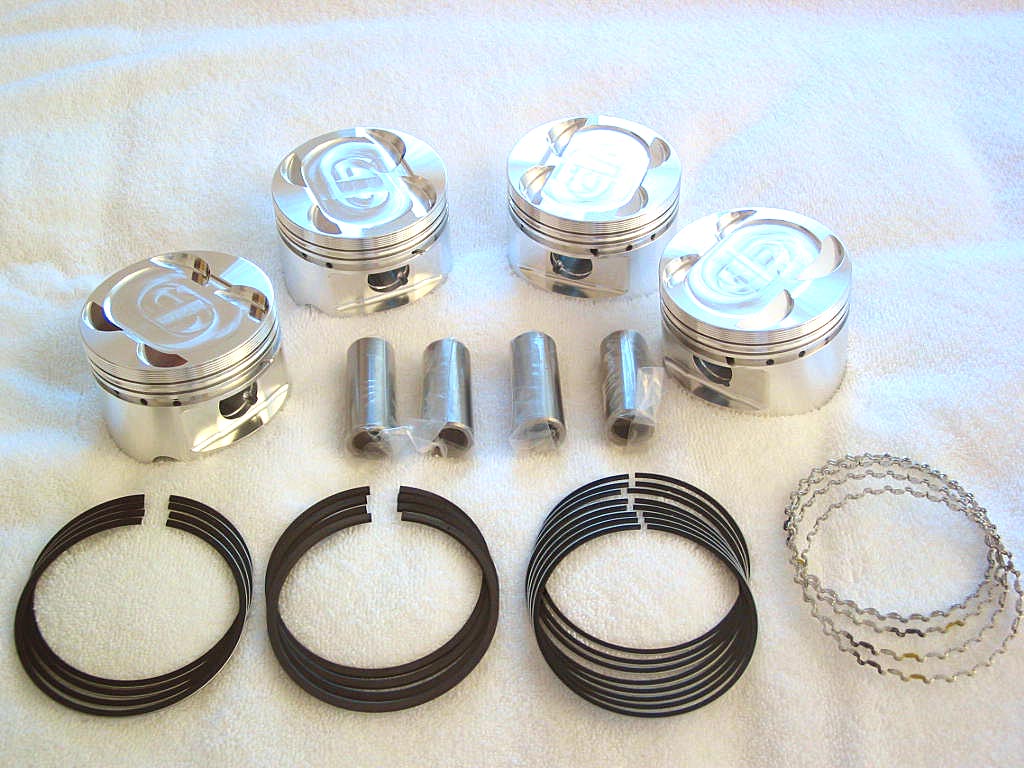
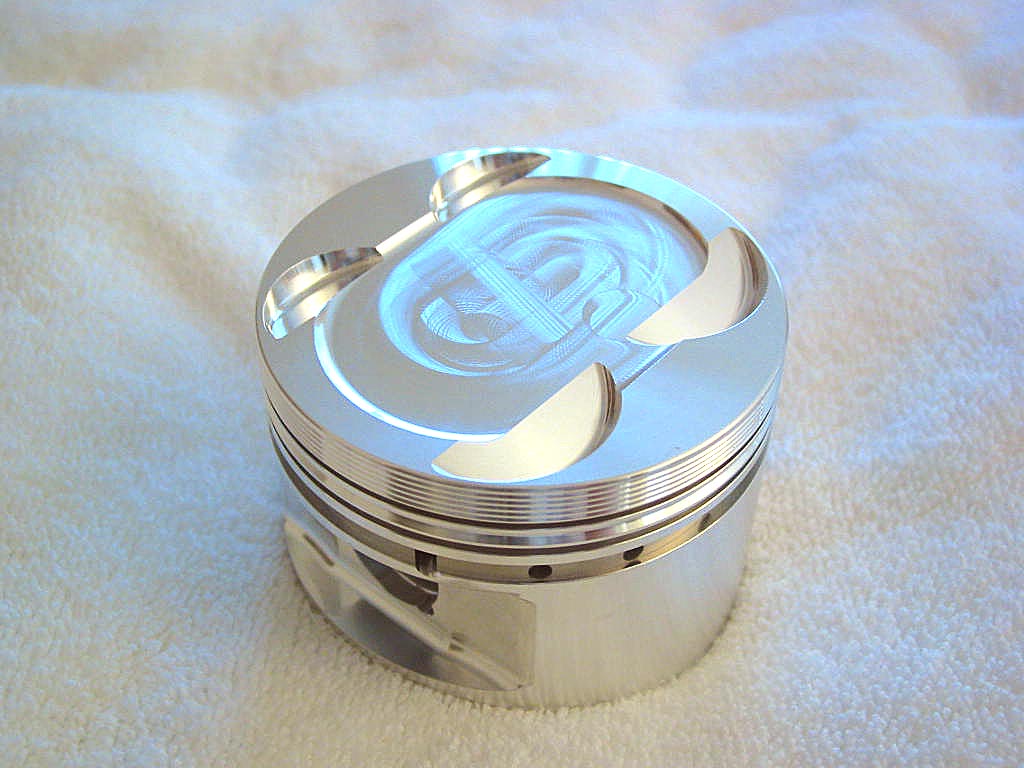
Pistons
JE forged, 8.5:1, .020"
over, ARP rod bolts
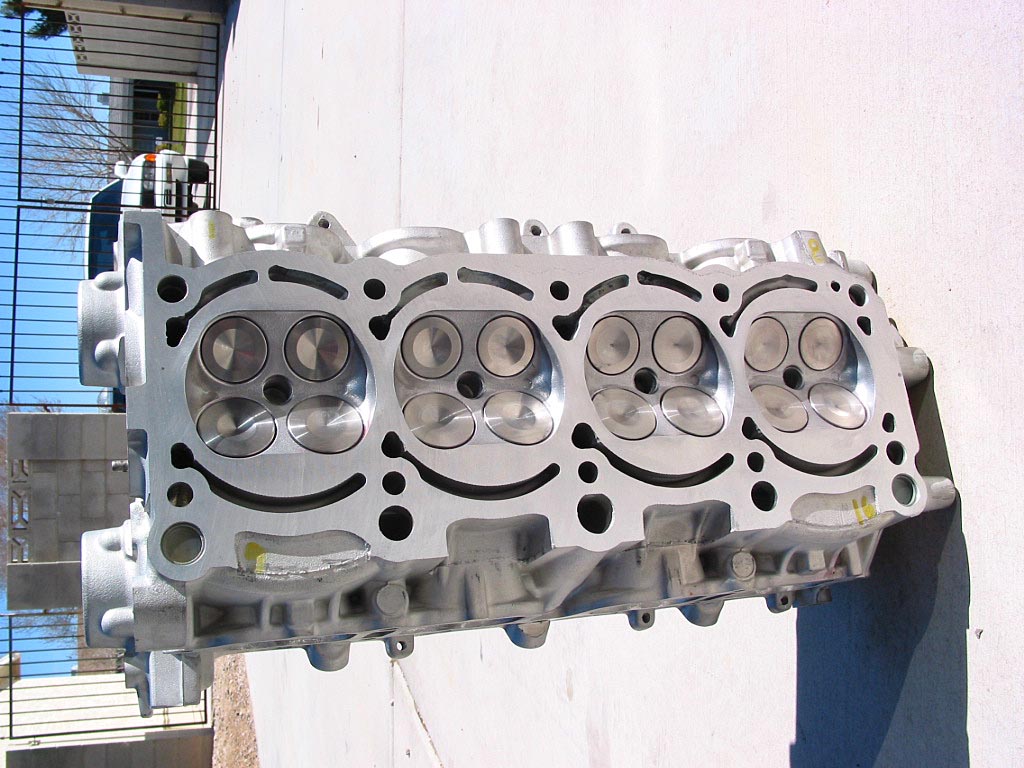
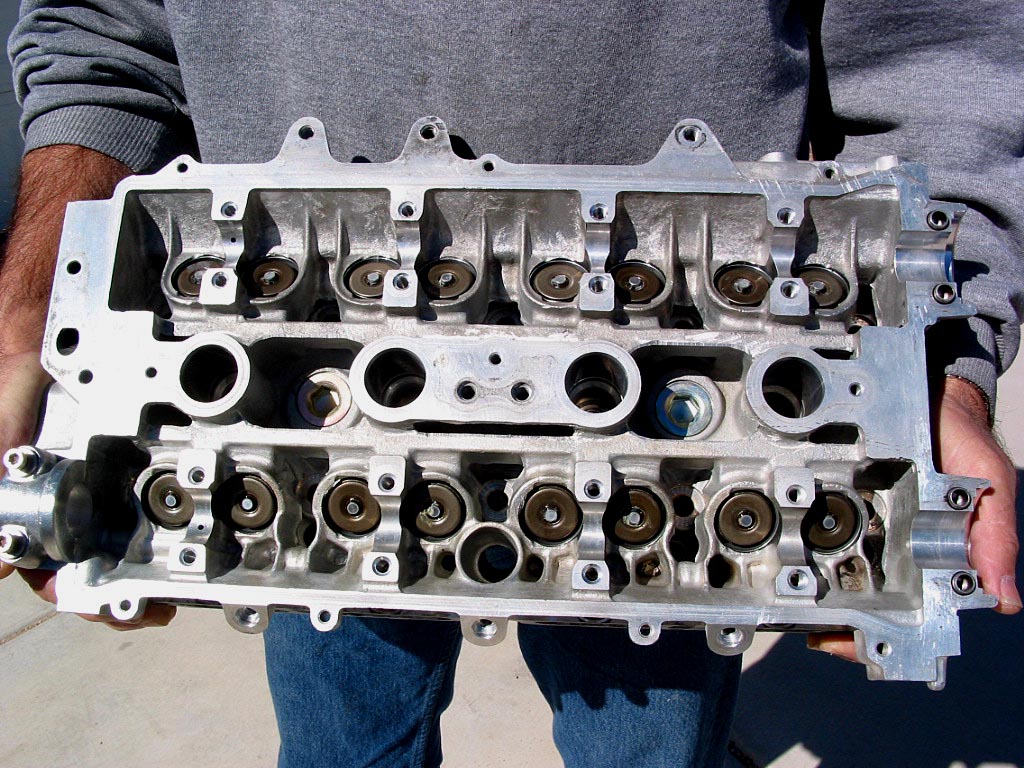
Head
Ported with Si oversize
stainless
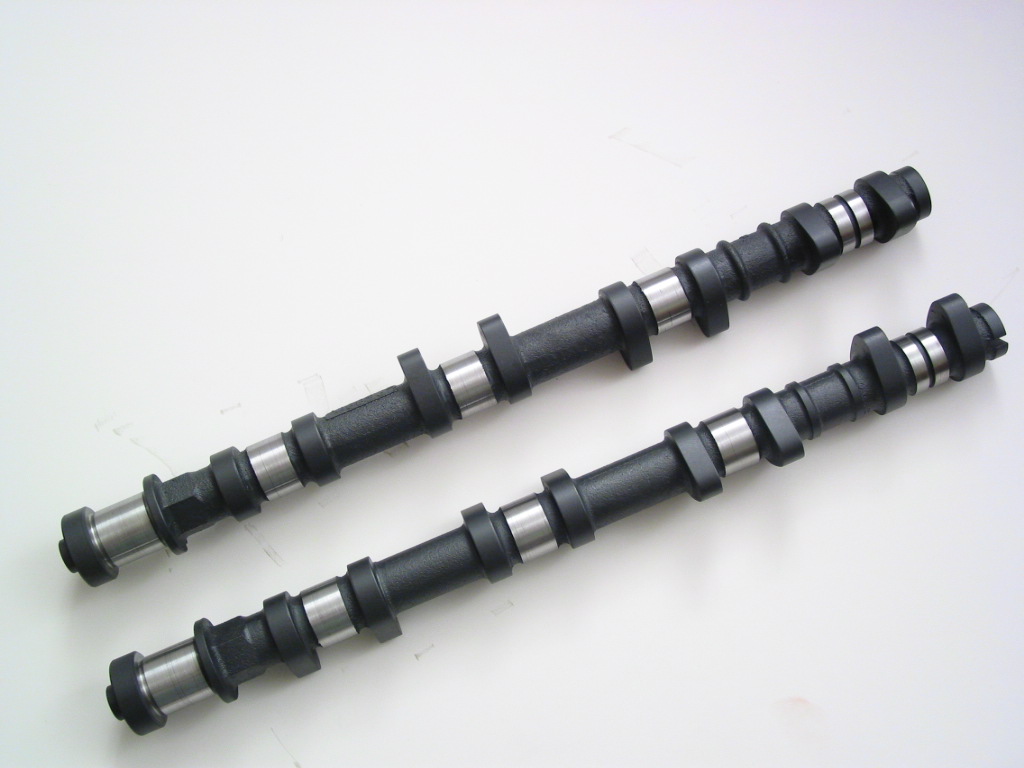
valves; Web cams;
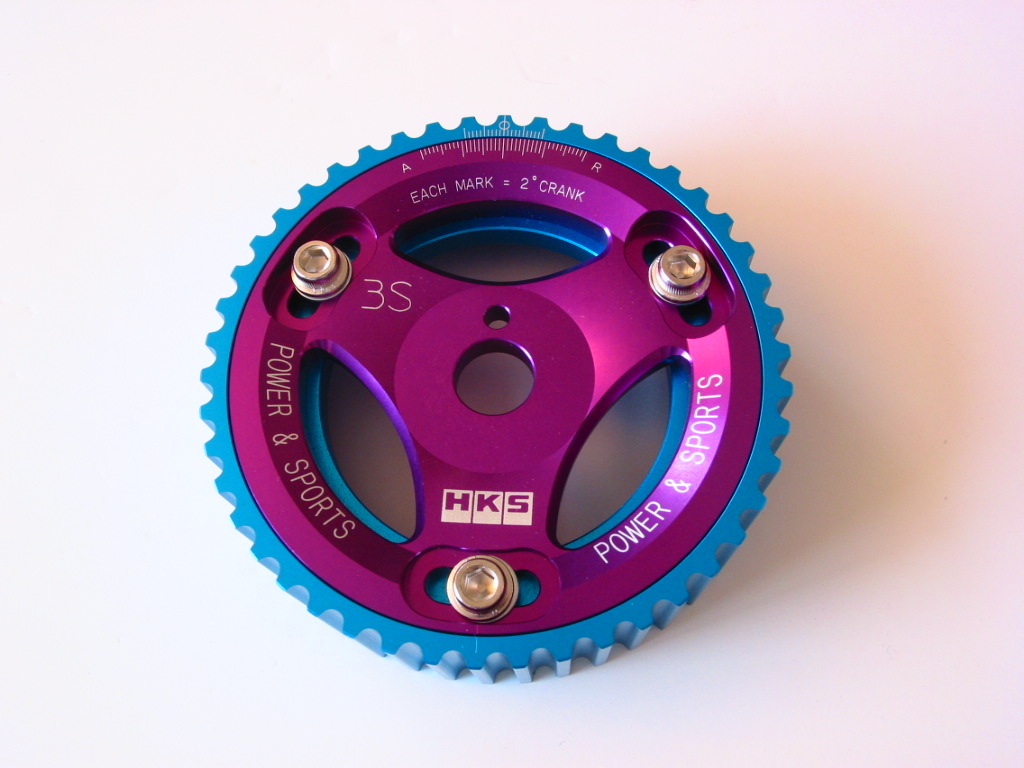
HKS adjustable cam gears;
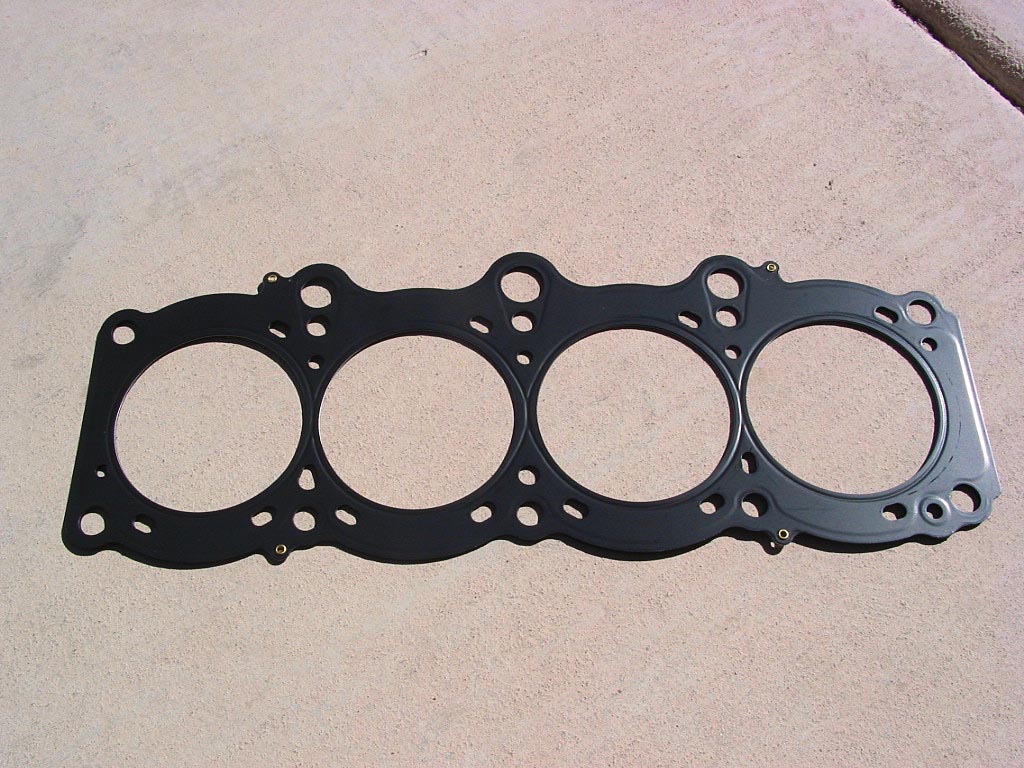
HKS 1.0 mm stopper-type head gasket;
ARP studs;
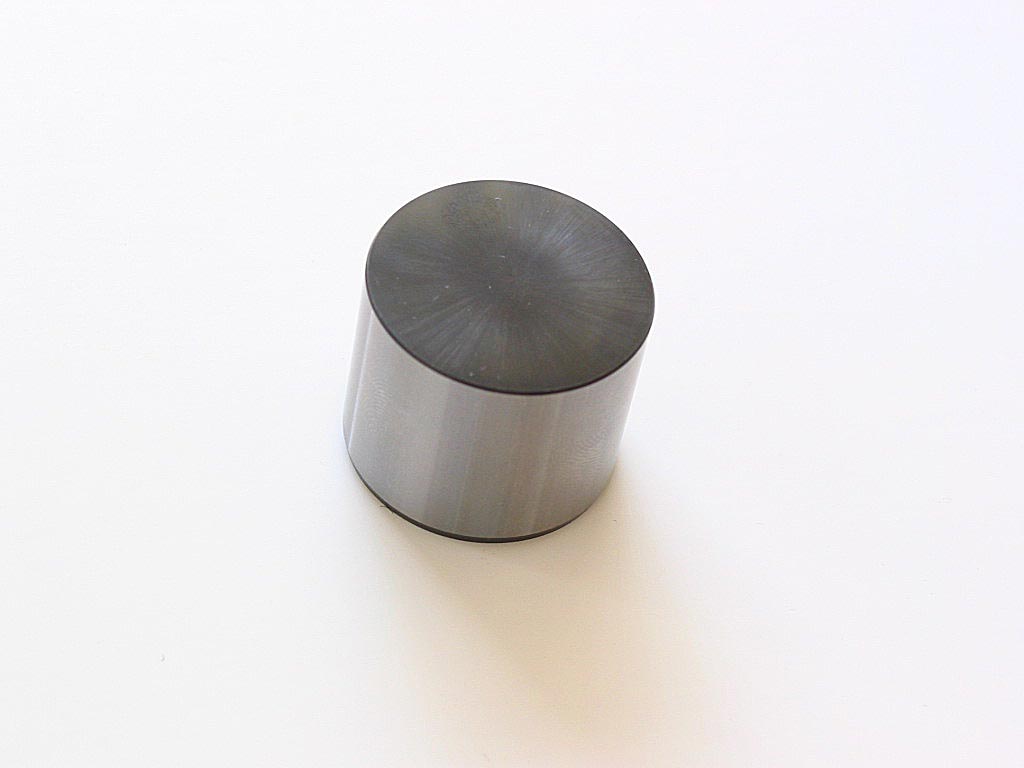
Toyota Spyder shimless buckets; Engle valve springs
Intake
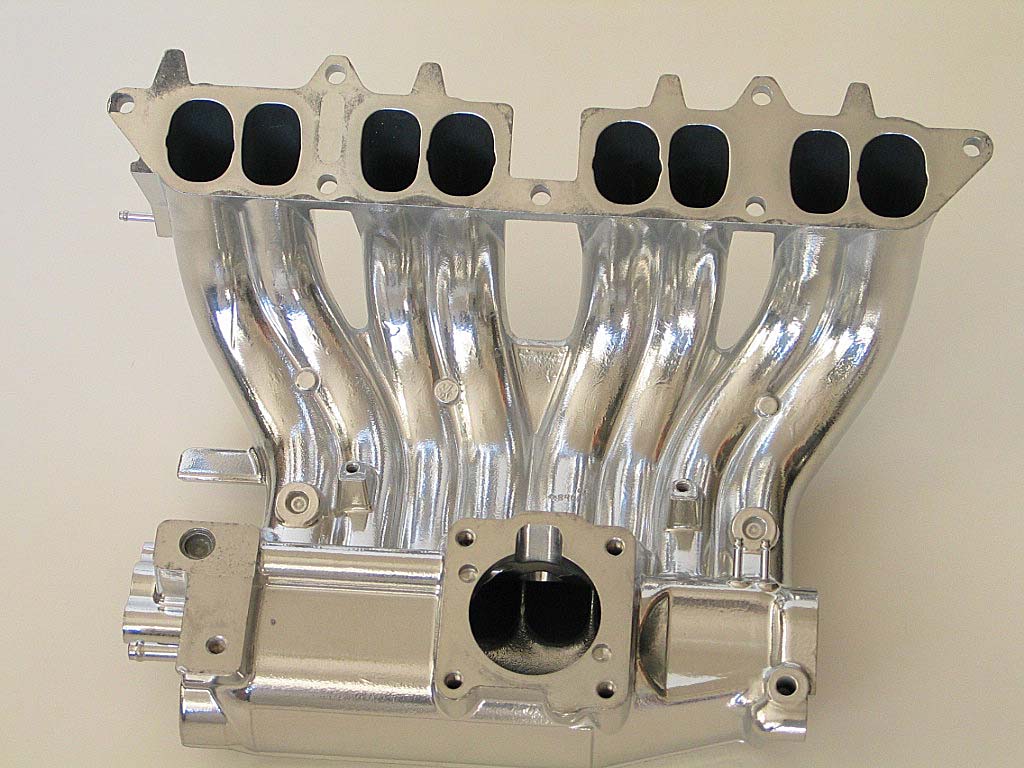
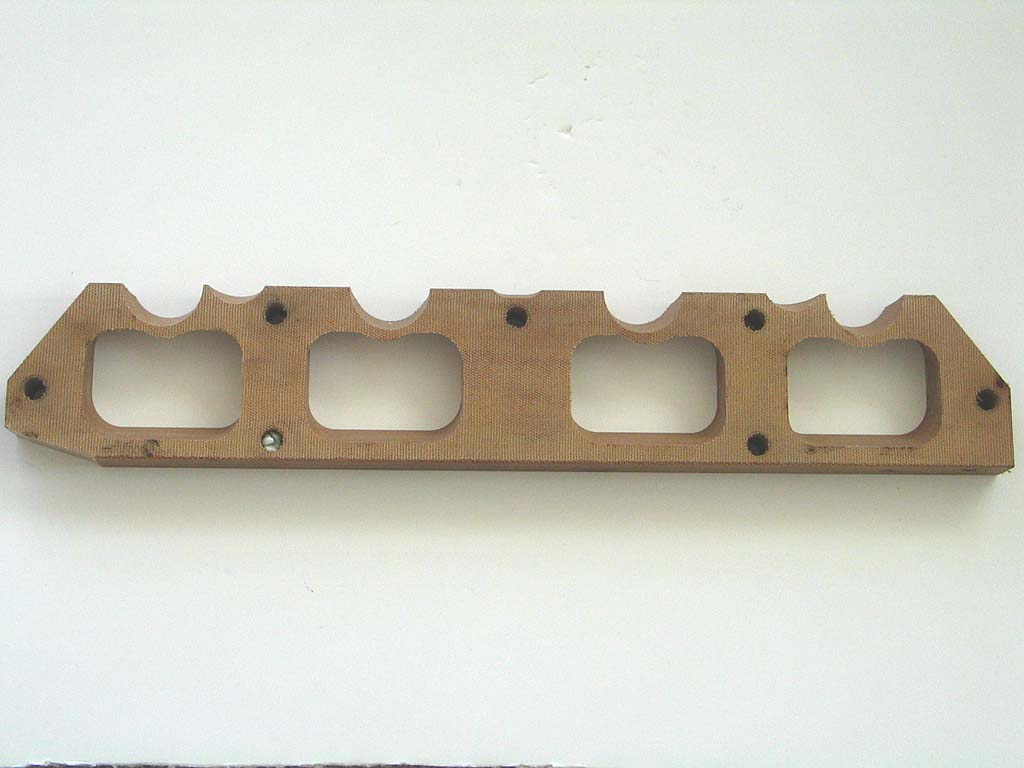
Ceramic-coated, Extrude-Honed intake manifold; TVIS Eliminator/Insulator from Manjit Gosal
Fuel
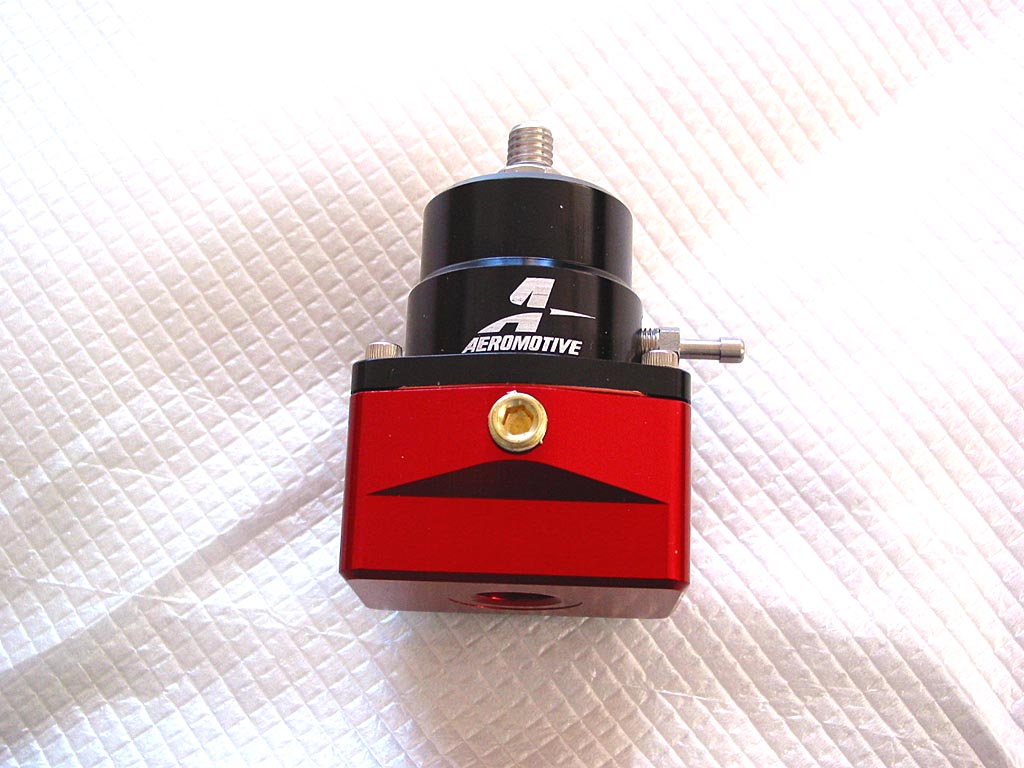
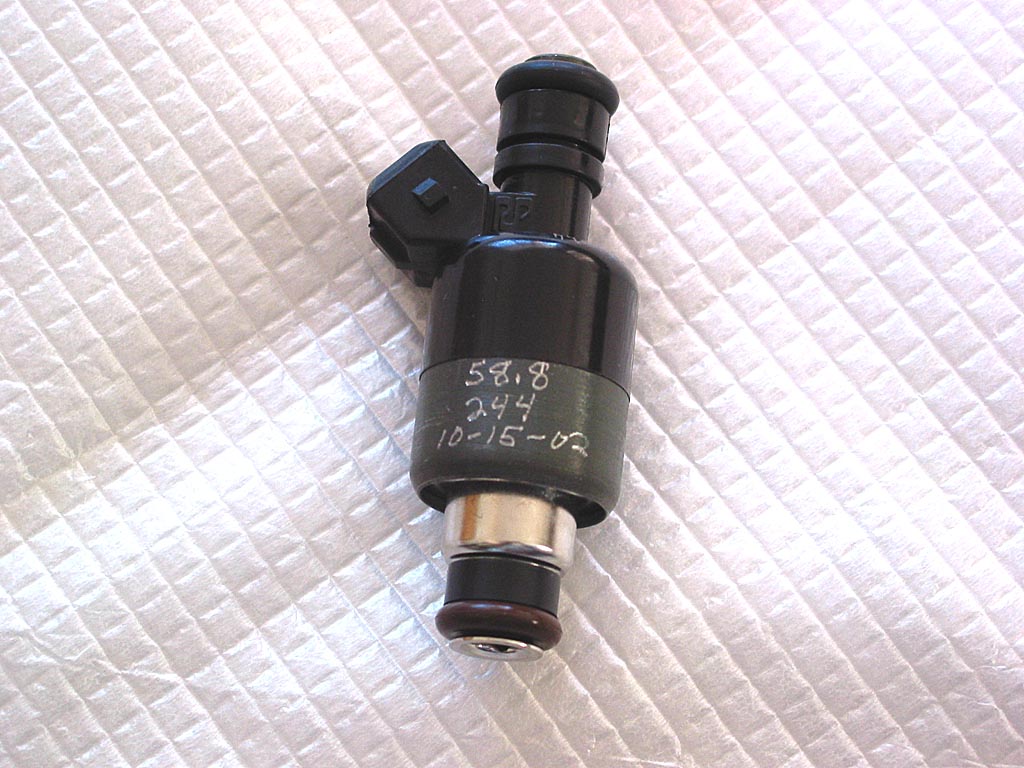
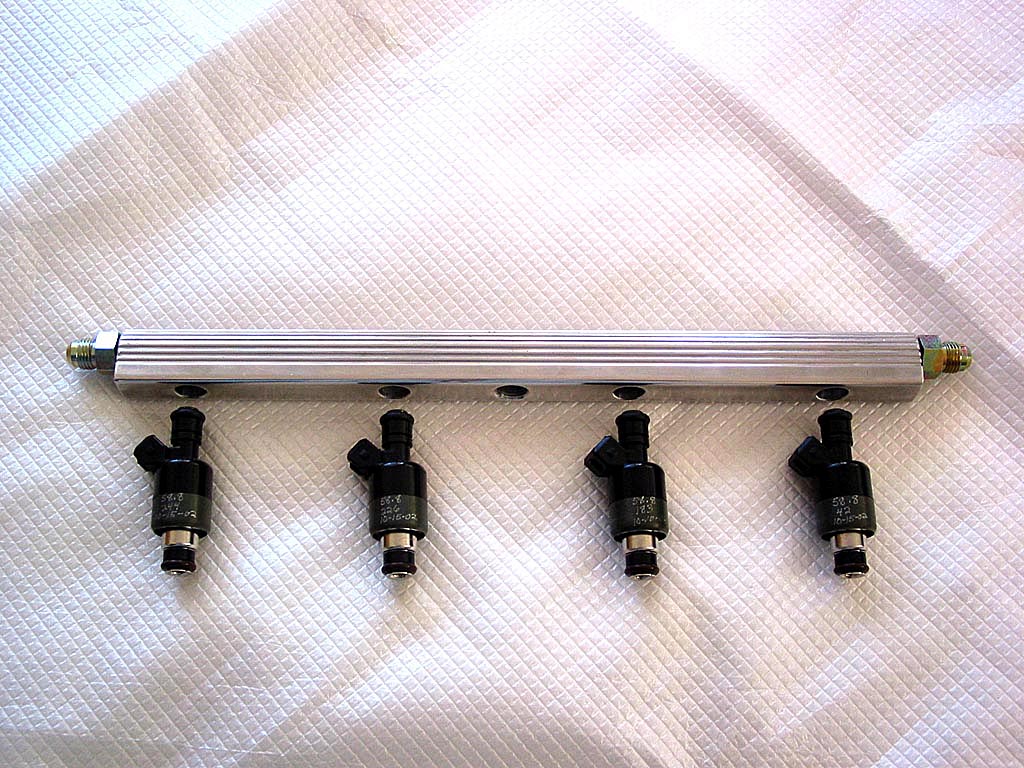
GarageAdvance fuel rail; 65
lb. injectors; Aeromotive AFR; SS braided hoses;
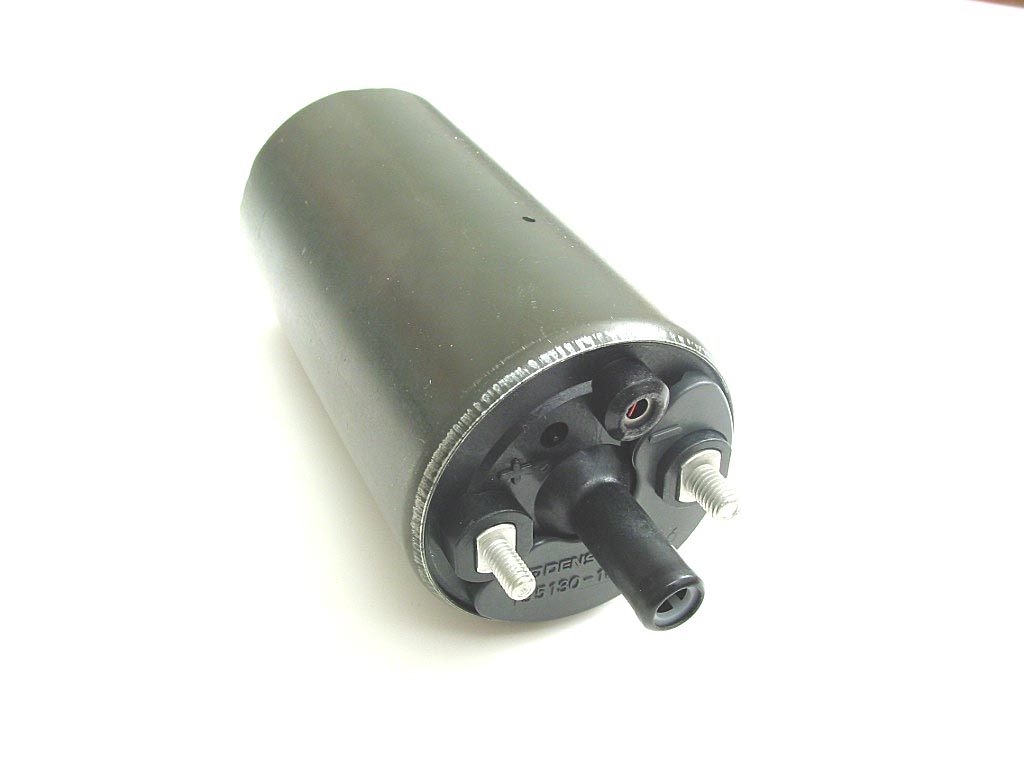
Toyota Supra TT fuel pump
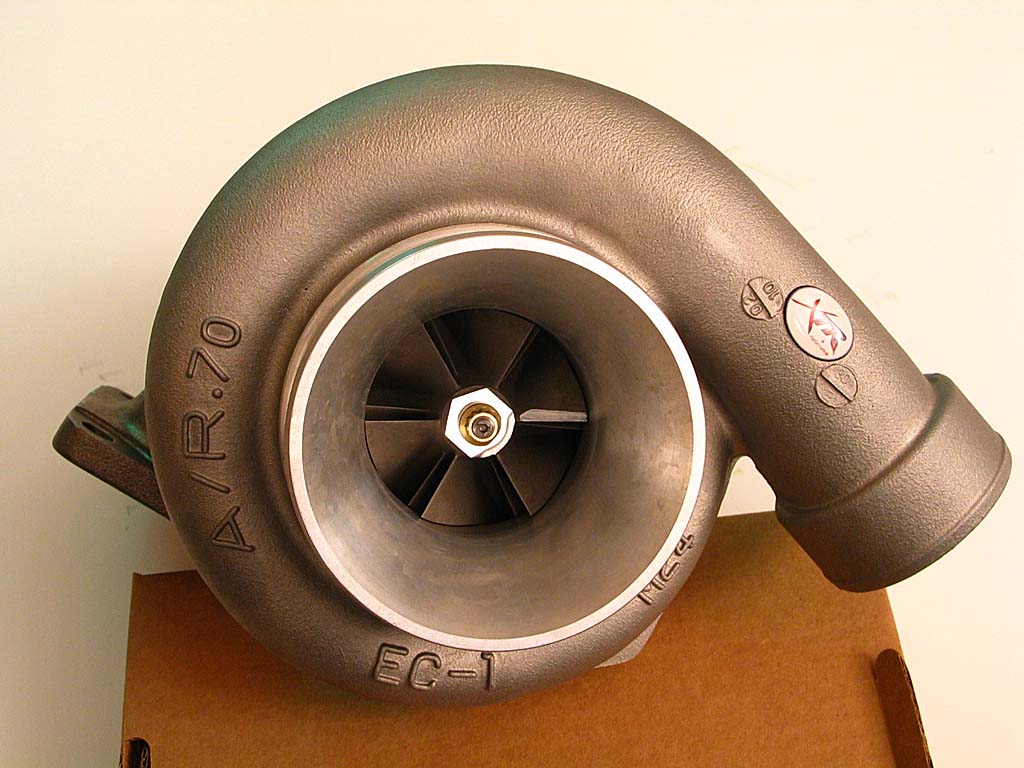
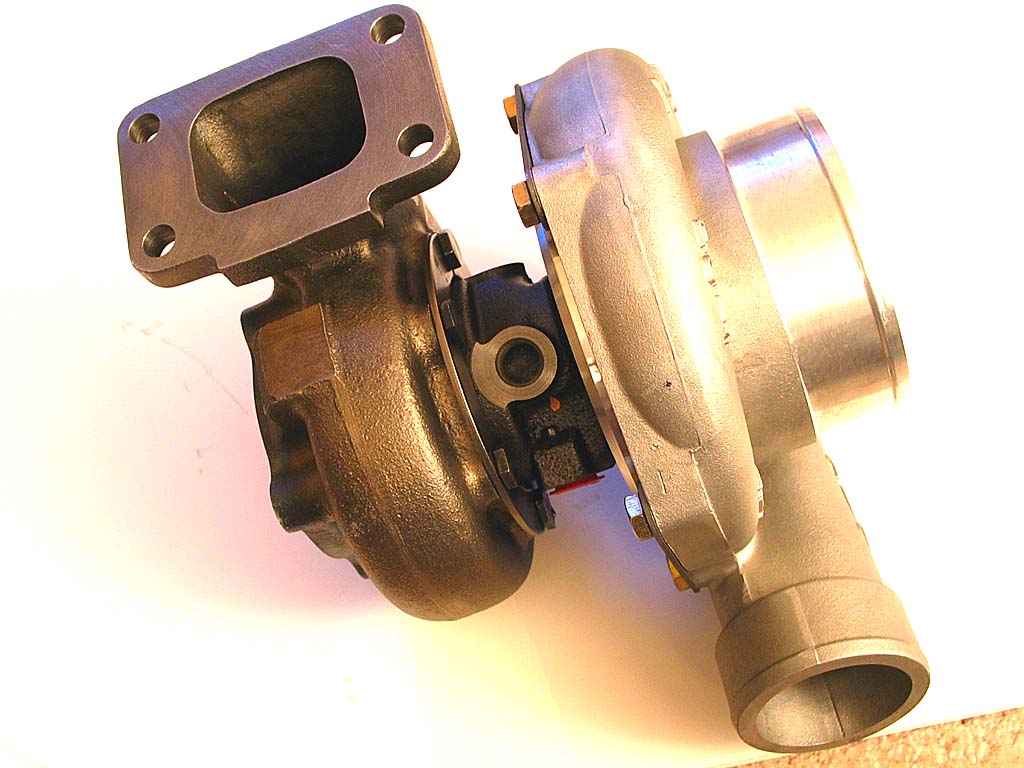
Turbo
Click here to read about my
problems with eXtremeBoost
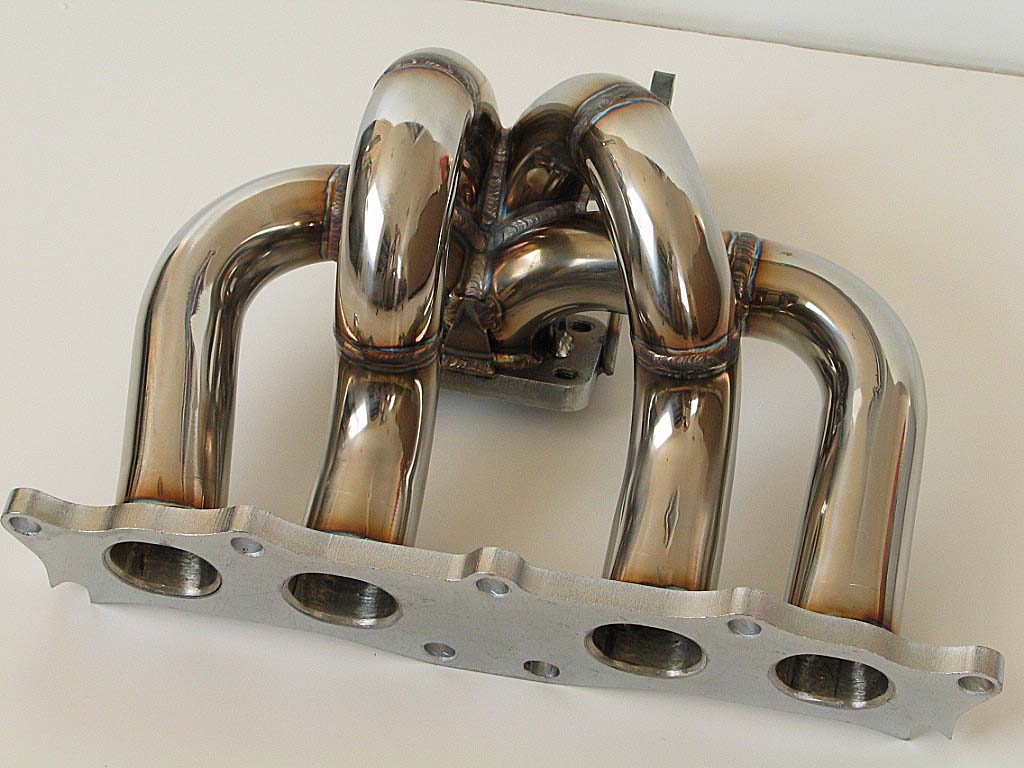
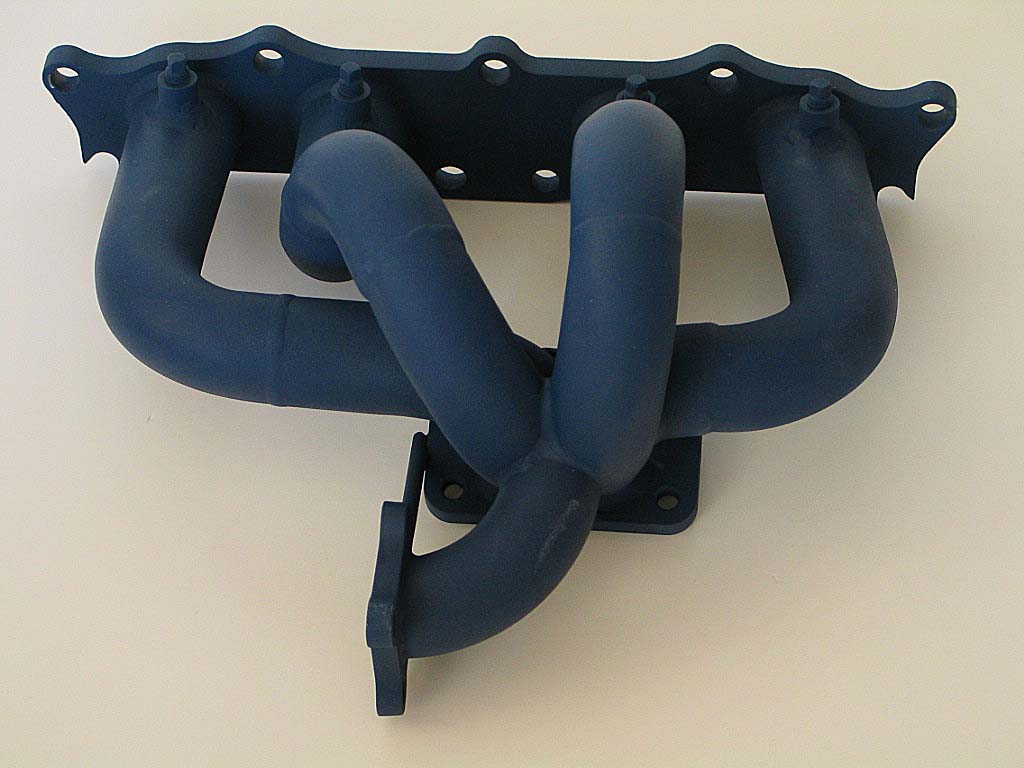
GT30 ball-bearing turbo kit with .70 compressor A/R & .82
turbine A/R; Tial 46mm wastegate; stainless
exhaust manifold and downpipe with 2000° ceramic coating by
Jet-Hot;
stainless braided oil & coolant hoses


Intercooler
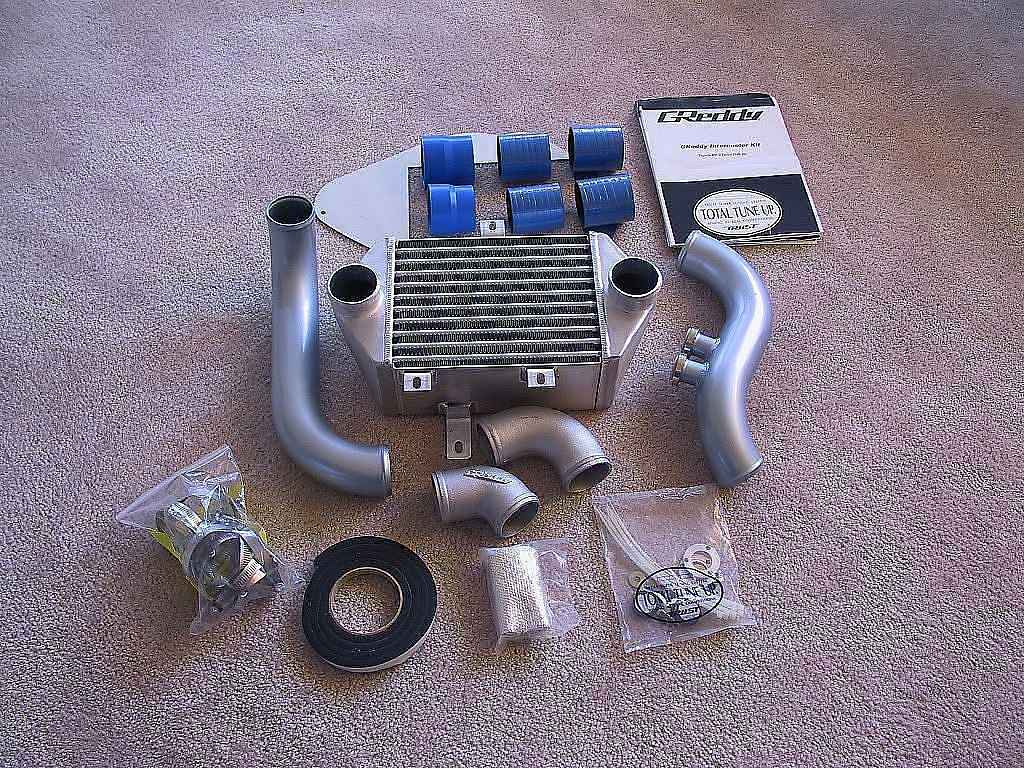
GReddy intercooler;
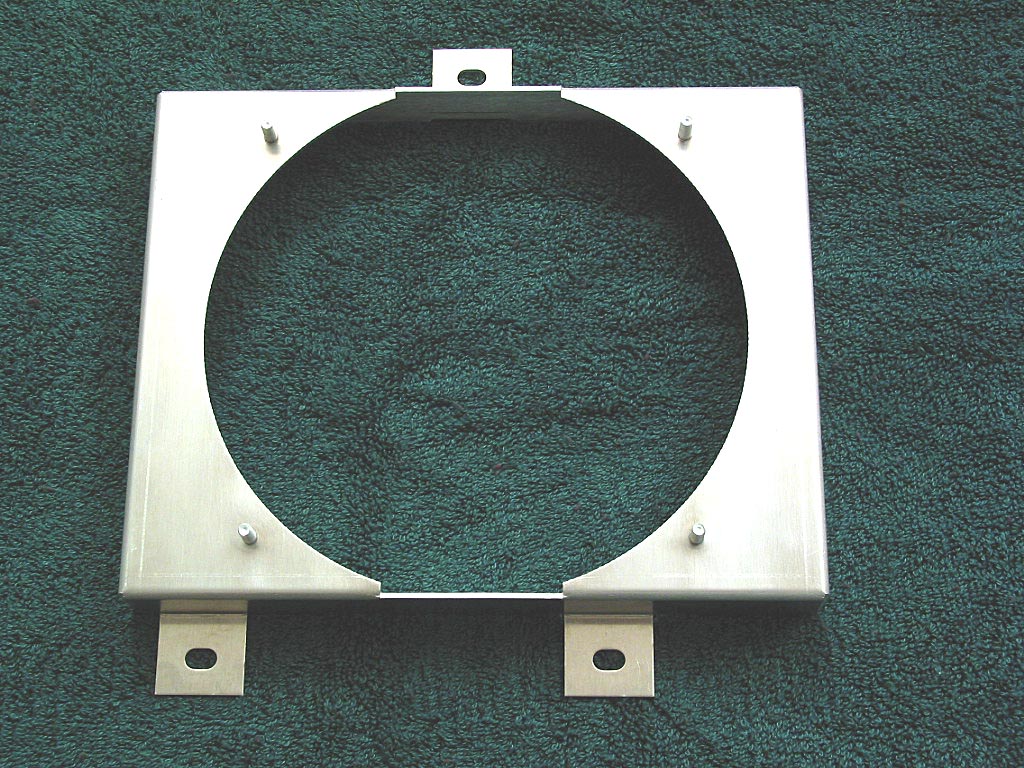
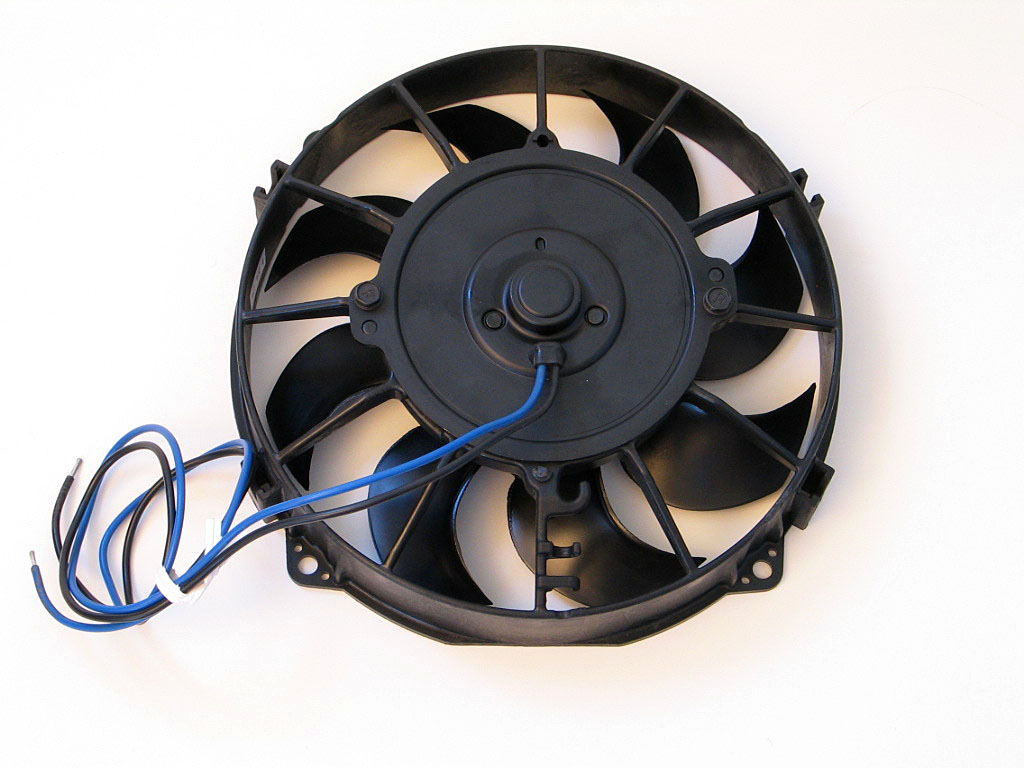
Tripac 7˝" puller fan with custom stainless fan shroud
by Manjit Gosal
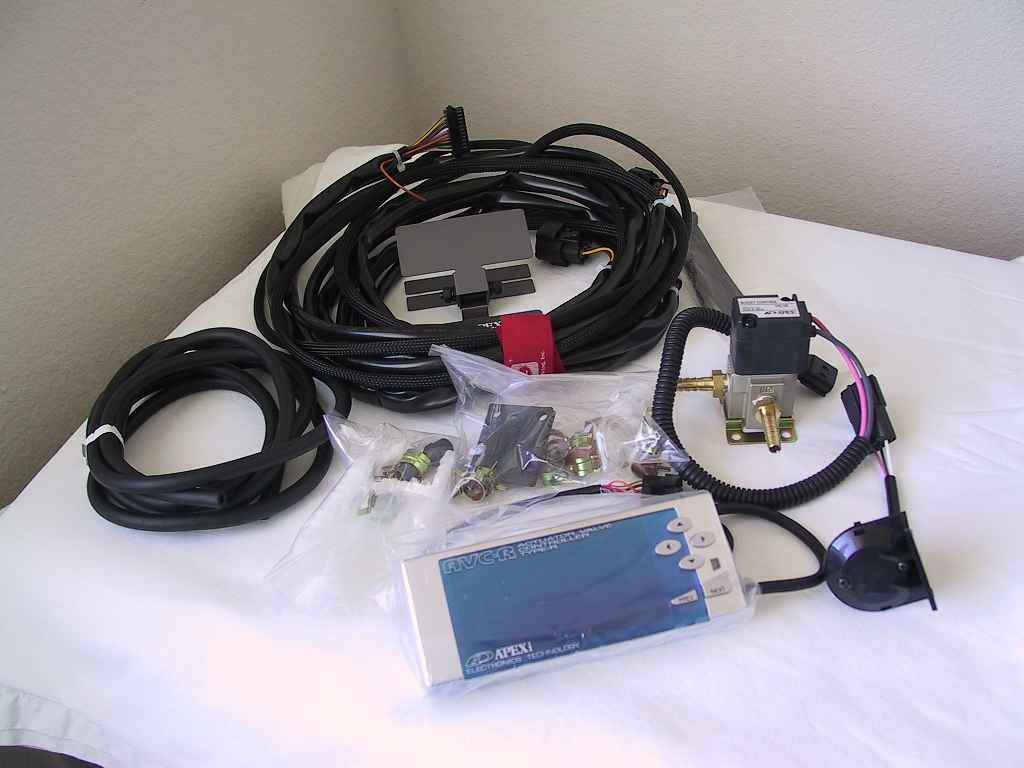
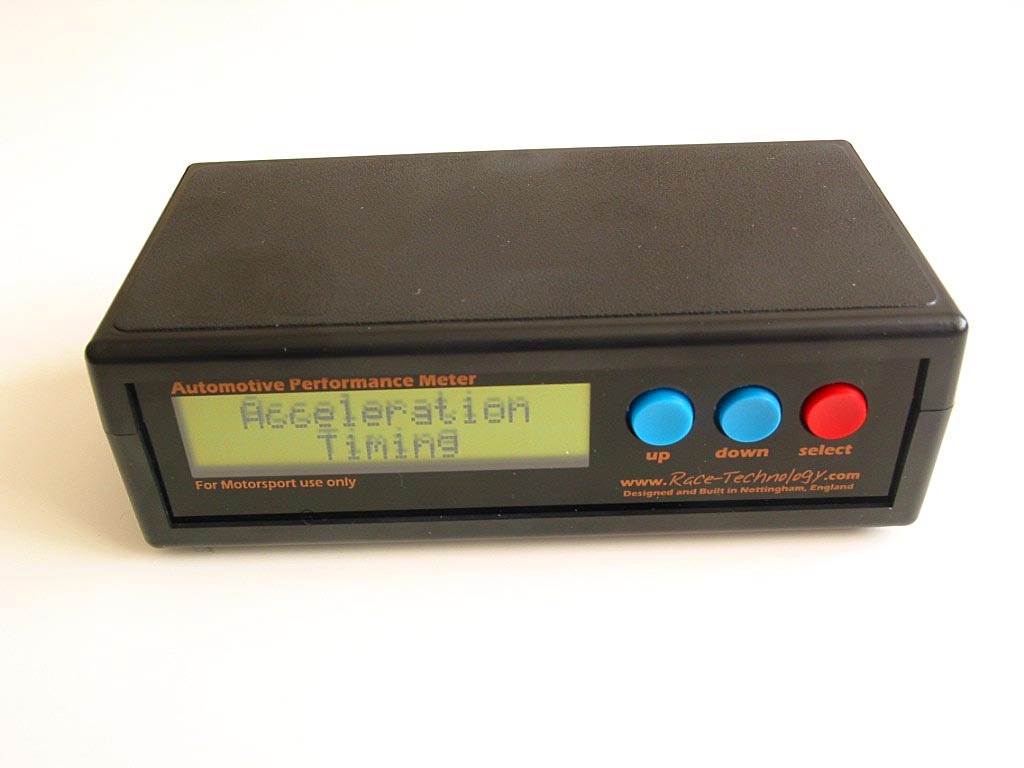
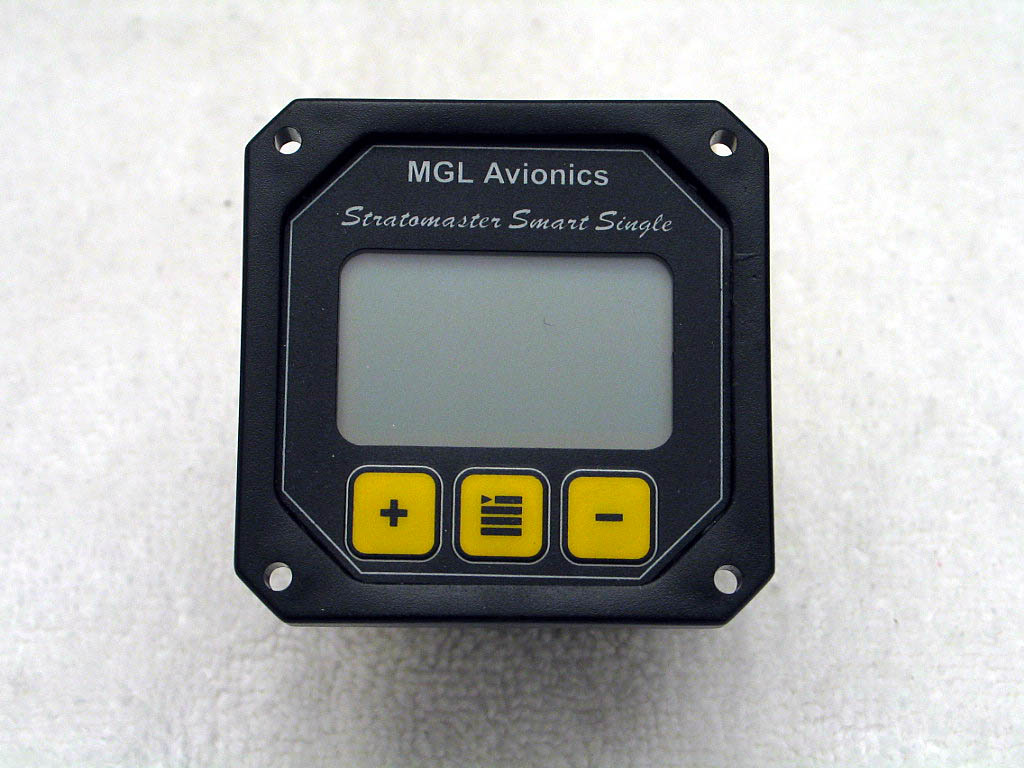
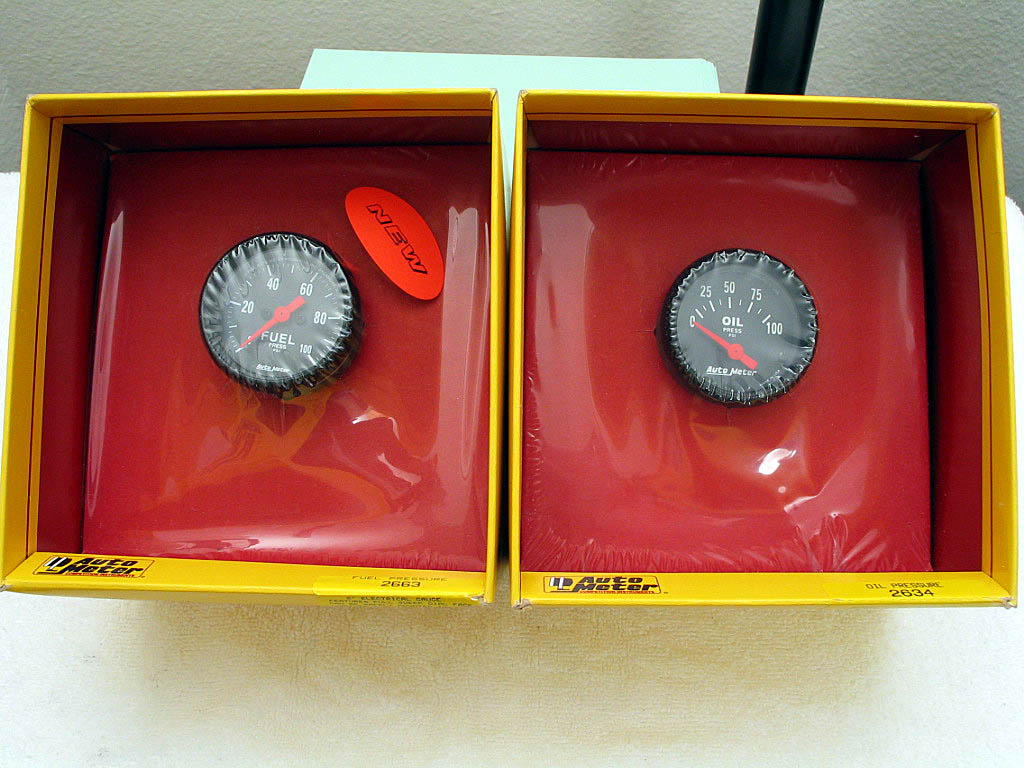
Electronics
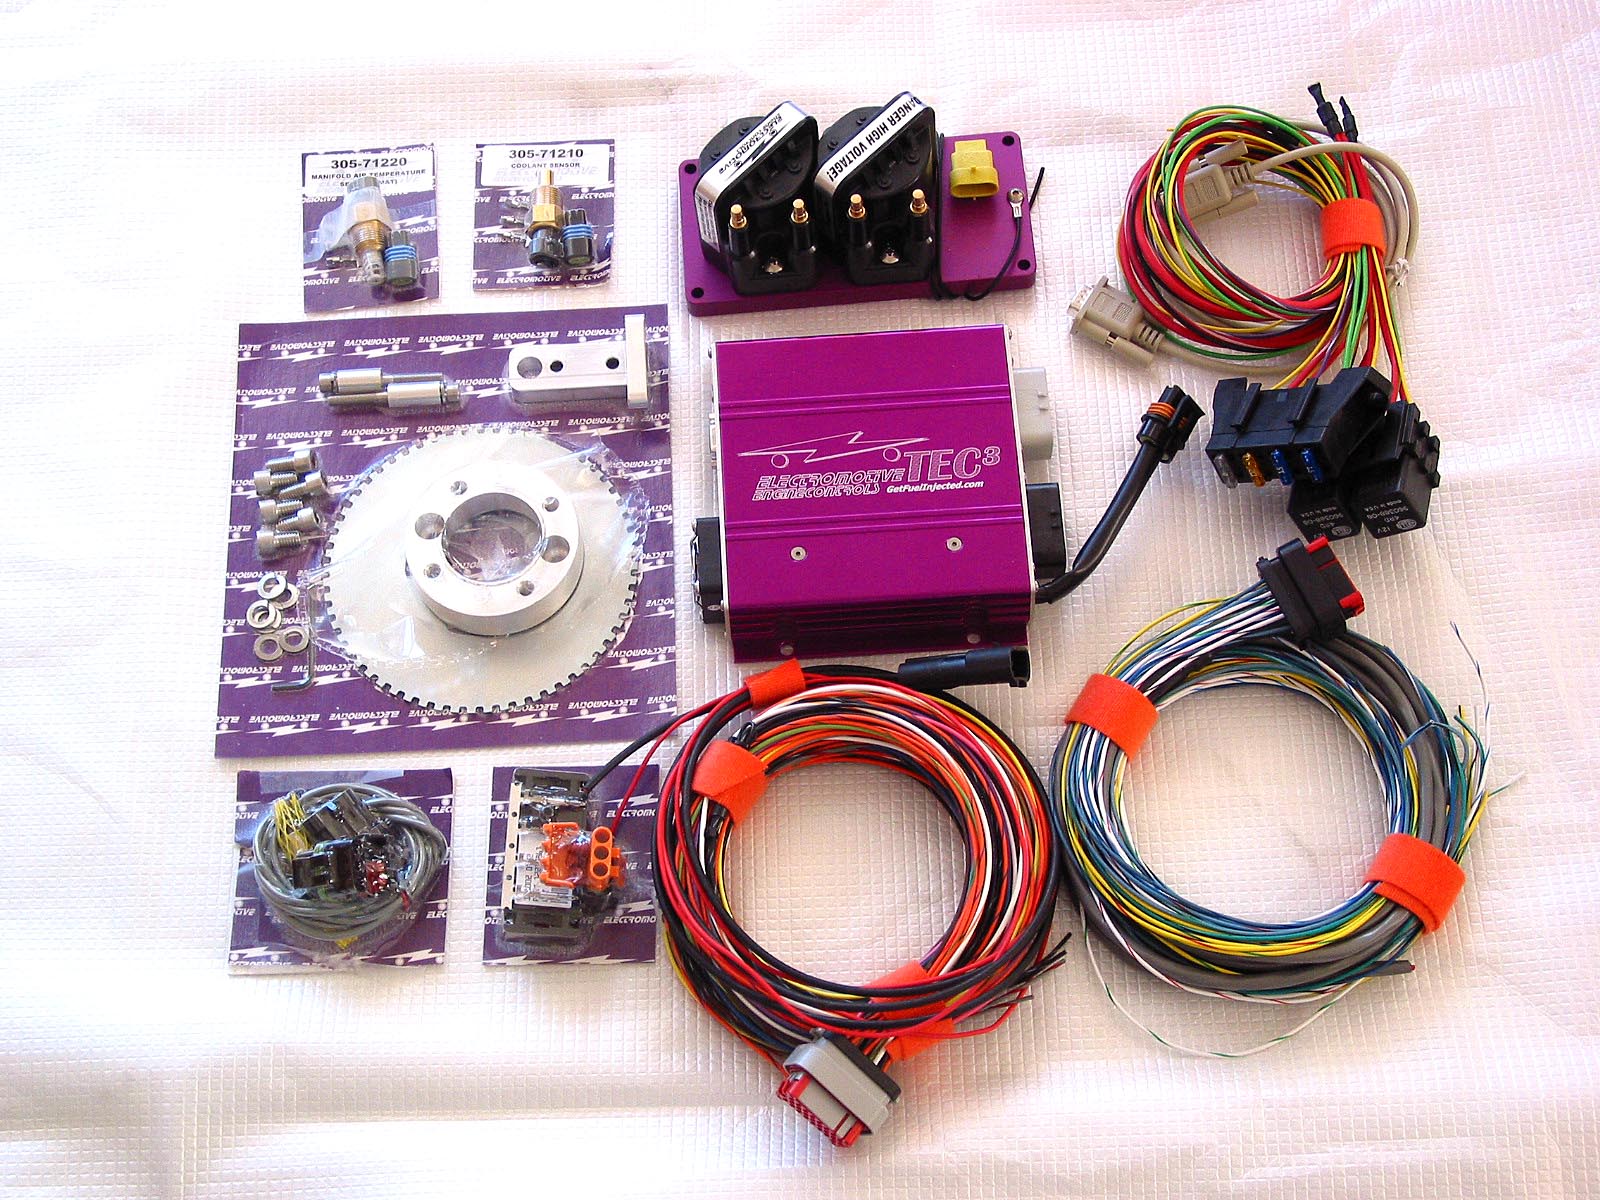
TECł EMS and ignition;
Apexi AVC-R
boost controller; Tech Edge wide-band oxygen sensor kit;
Race-Technology AP-22 performance meter;
MGL Avionics
TC-1 gauge for monitoring multiple EGT sensors;
Auto Meter Fuel/Oil
Pressure and EGT gauges.

Miscellaneous
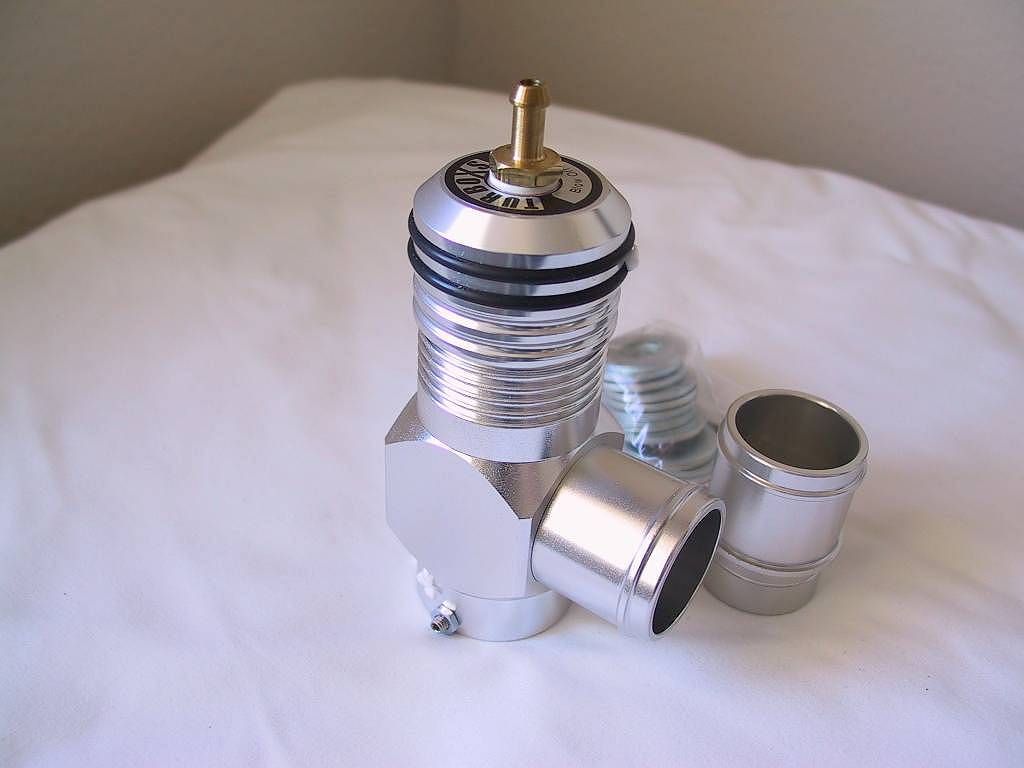
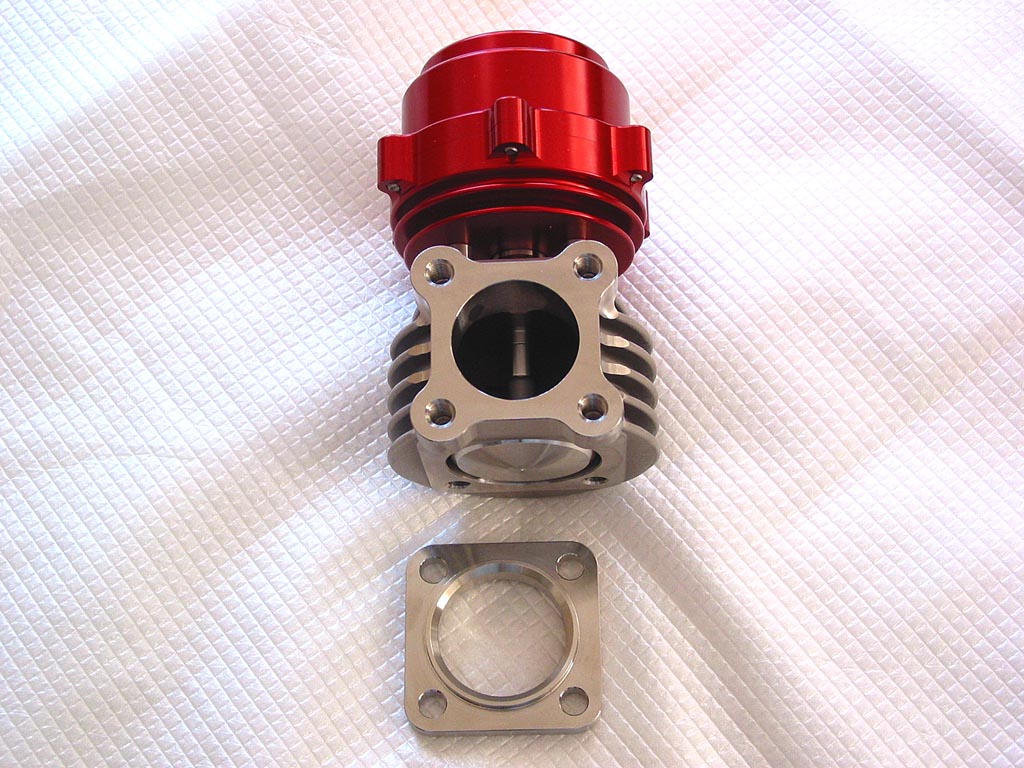
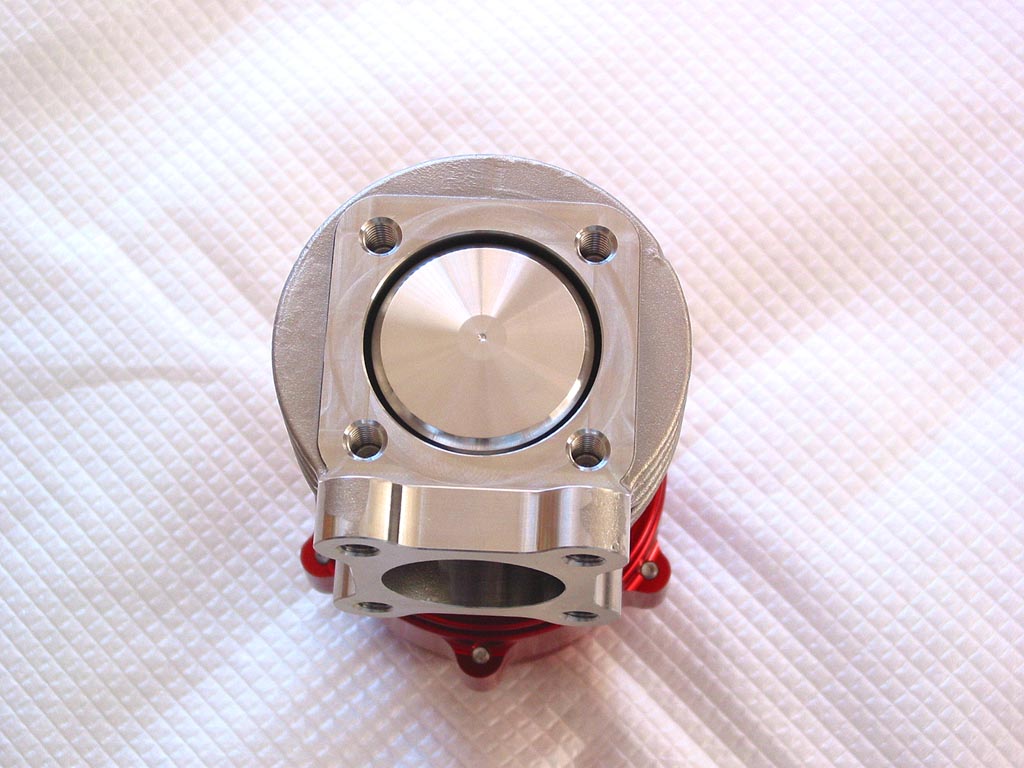
TurboXS Racing Type H (H34) BOV;
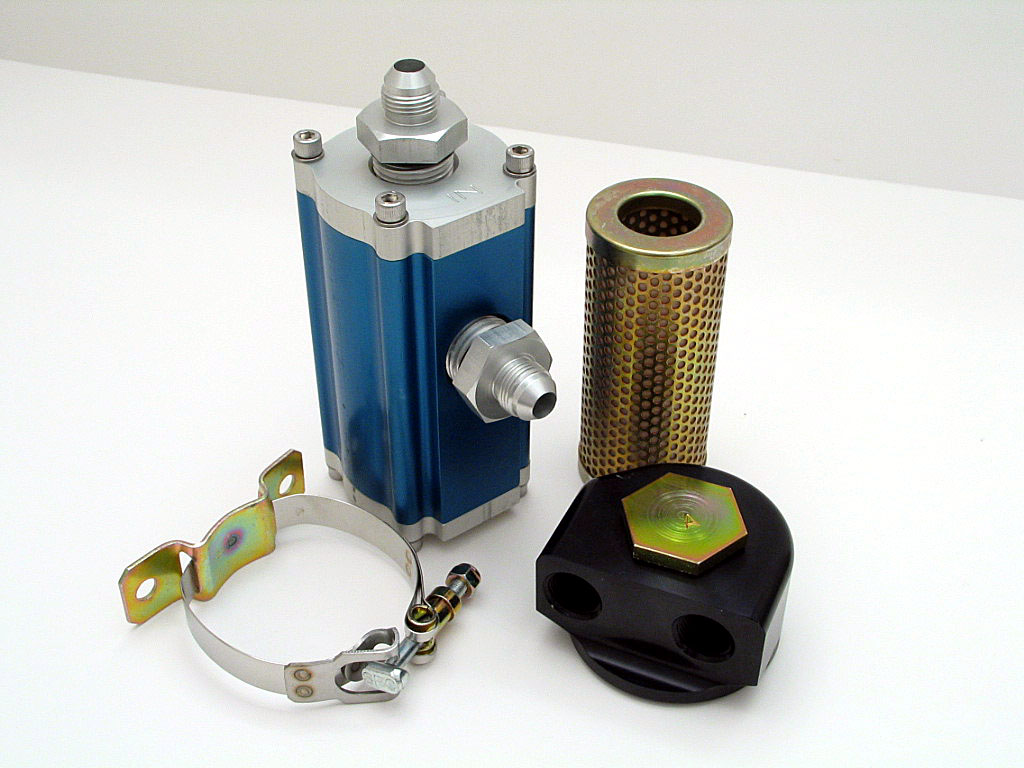
Canton/Mecca remote oil filter kit;
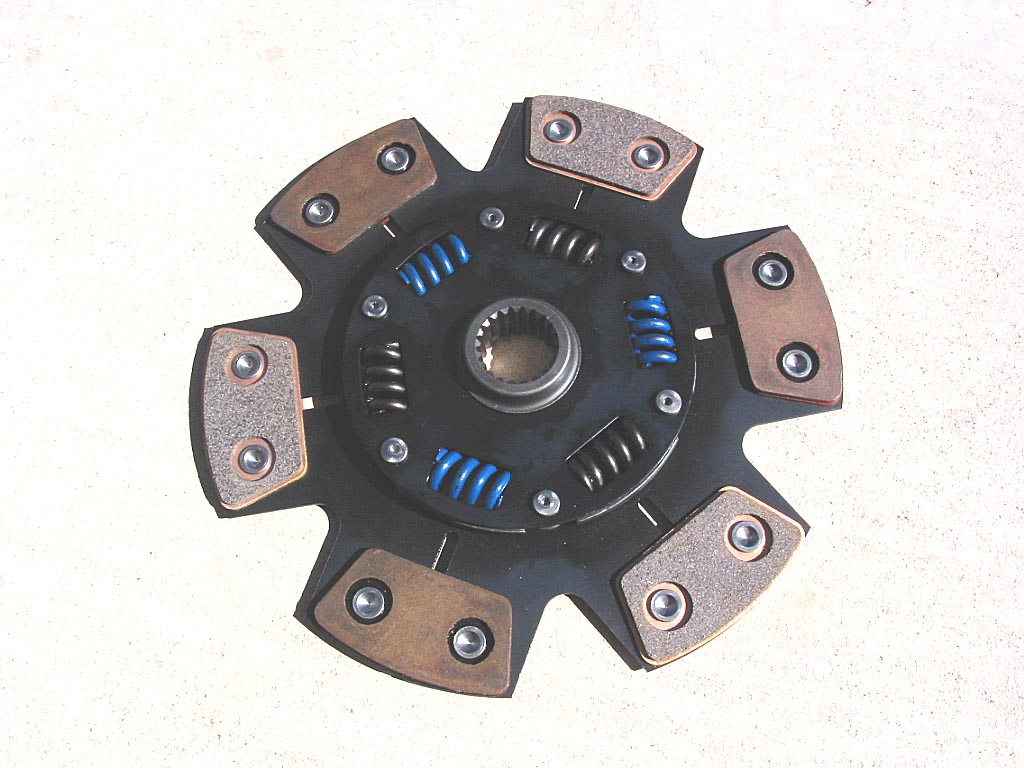
RPS
Sport Clutch and pressure plate; VmaxPerformance carbon-fiber engine lid
shroud with dual 11" Tripac fans;
KO Racing 3" exhaust;
Magnecor KV-85 wires;
ARP flywheel bolts; lightened
flywheel; brass shift cable bushings and stainless clutch cylinder hose from
Club MR2.