|
Page  1
2
3
4
1
2
3
4
 |
|
|
GReddy Intercooler Installation
(continued)
|
|
|
Now's the time to jack up the rear of the car and put it on jack stands,
as the A/C compressor needs to be moved out of the way. Make sure the car
is stable before getting under it.
|
|
|
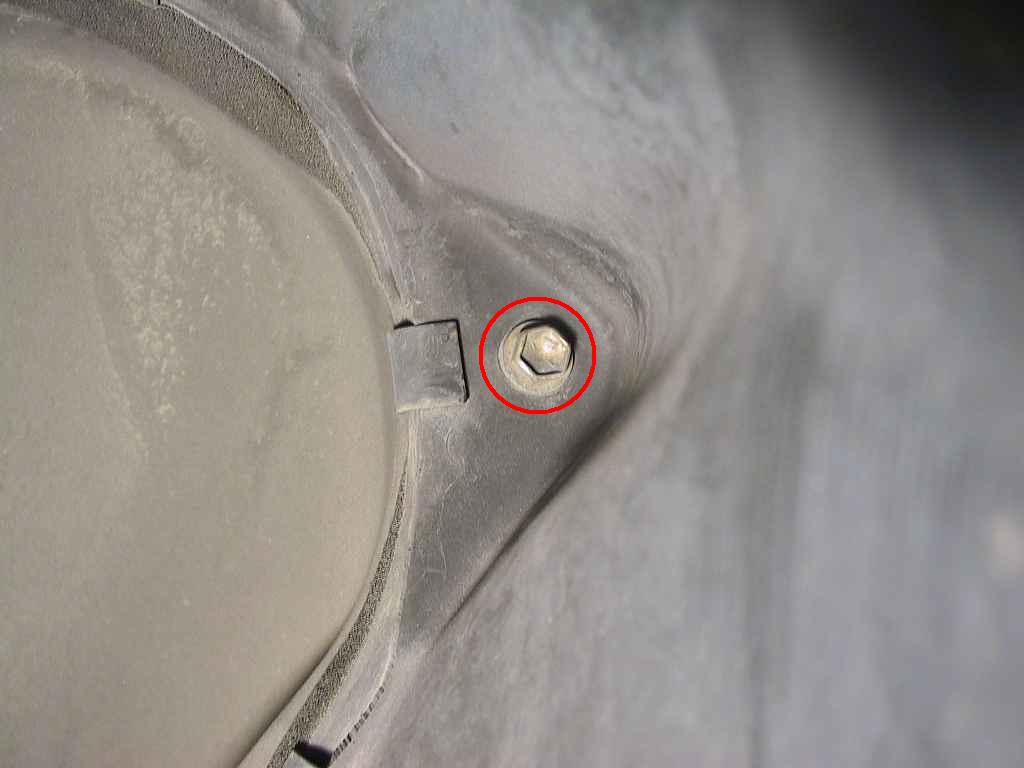
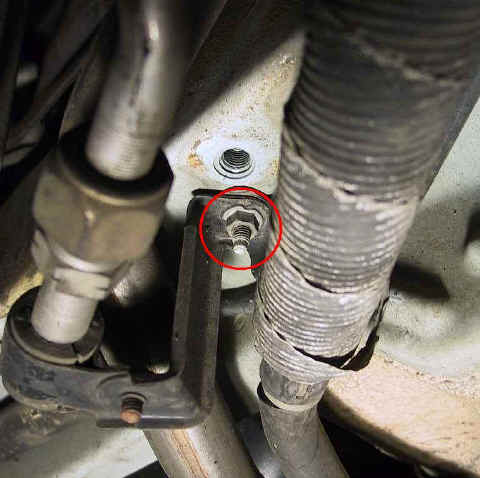
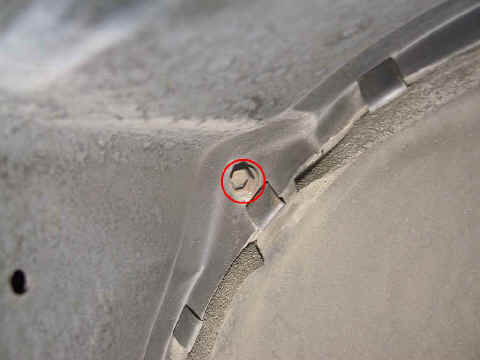
You'll need to remove the plastic underbody, which is attached with
several 10mm nuts and bolts. There are two bolts at the rearmost portion
of the underbody near the wheel, as shown here:
Once you've removed the underbody, place it aside out of the way.
|
|
|
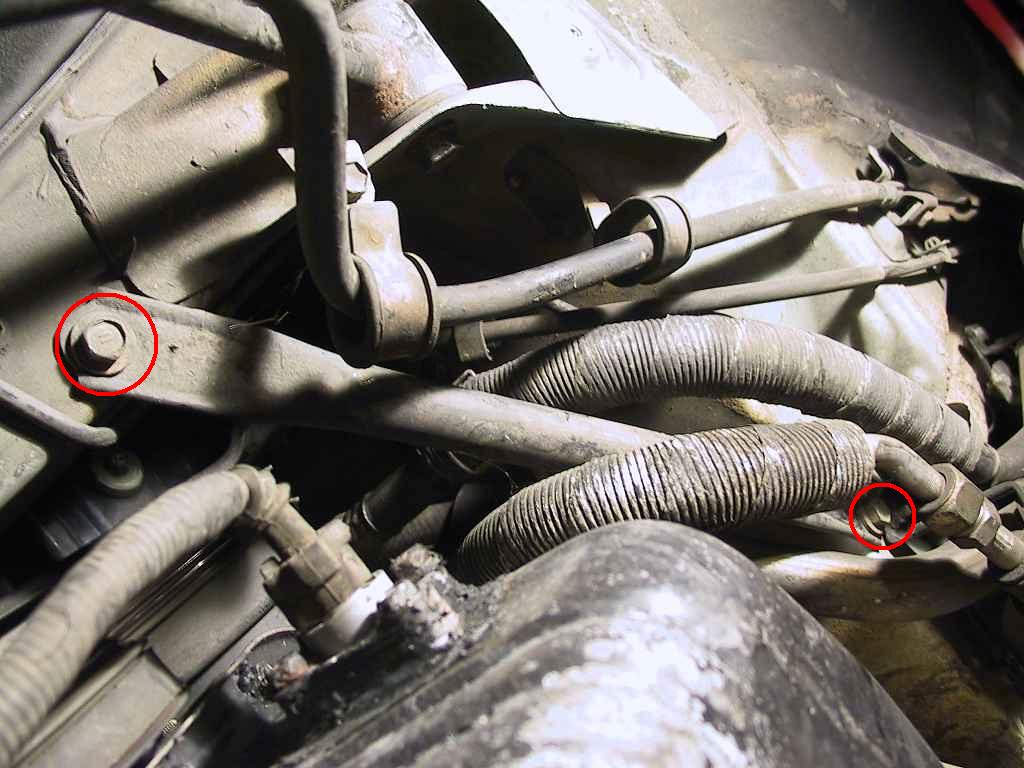
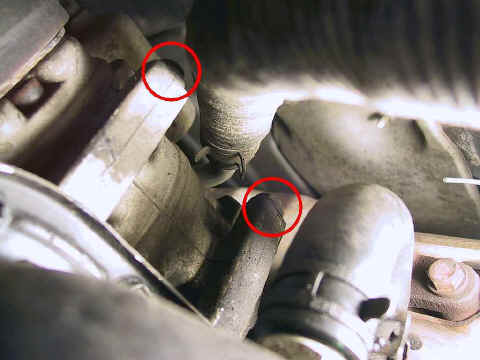
There's a stiffening brace that is attached diagonally across the
structure. There are two 14mm bolts securing it in place:
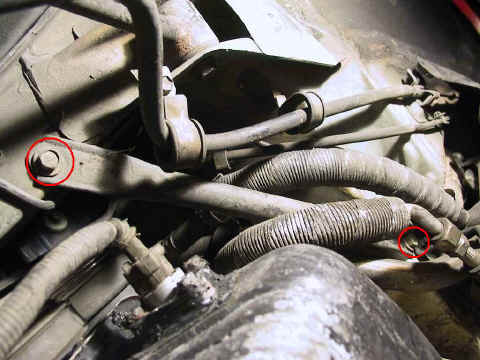
Remove this brace and set aside.
|
|
|
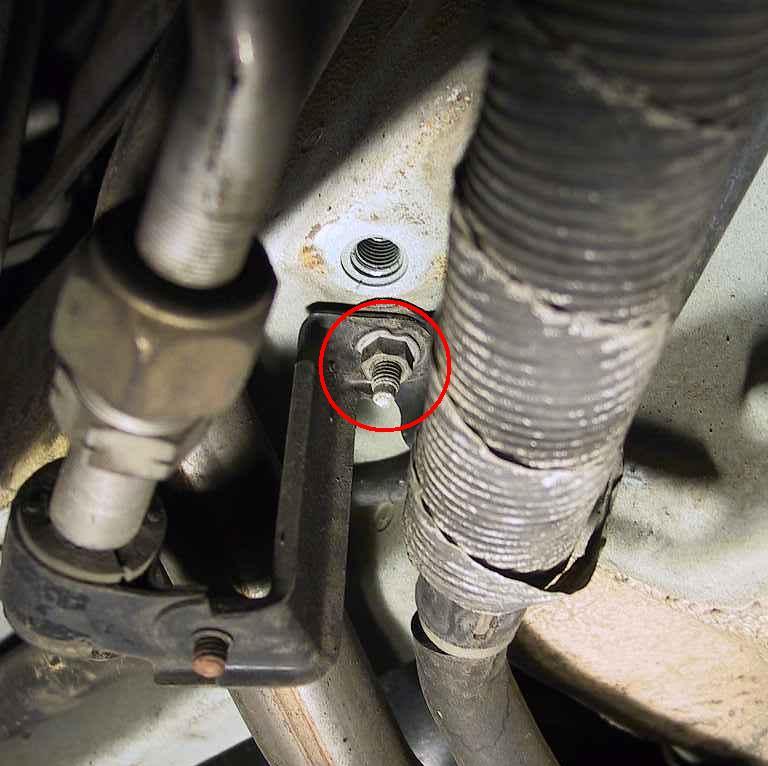
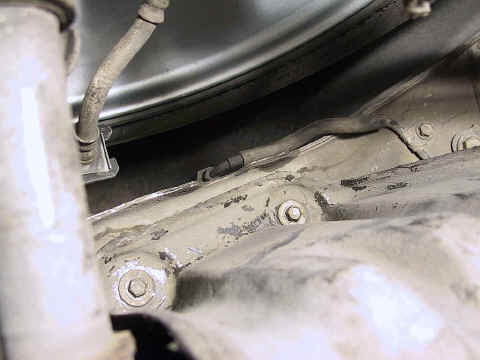
Next, you'll need to detach the bracket that holds the A/C lines that lead
to the compressor. This is a 10mm nut. This bracket also provides a mount
for the underbody, so remember how it fits:
|
|
|
There are two 12mm (?) bolts that secure the A/C compressor:
Remove both bolts and carefully lower the compressor the few inches you
have available.
|
|
|
|
Here's where I needed a helper. He held
onto the intercooler from above while I removed the lower IC bracket.
Then, I carefully maneuvered the A/C compressor down and away (taking care
not to stress the A/C lines), at the same time compressing the lower coolant hose,
while he twisted the IC out
of its cavity in the body, and out of the car.
Needless to say, I don't have any photos of this procedure.
I wasted a good two hours trying to do this on my own, all the while
swearing at the engineer who left that bracket right in front of the
intercooler.
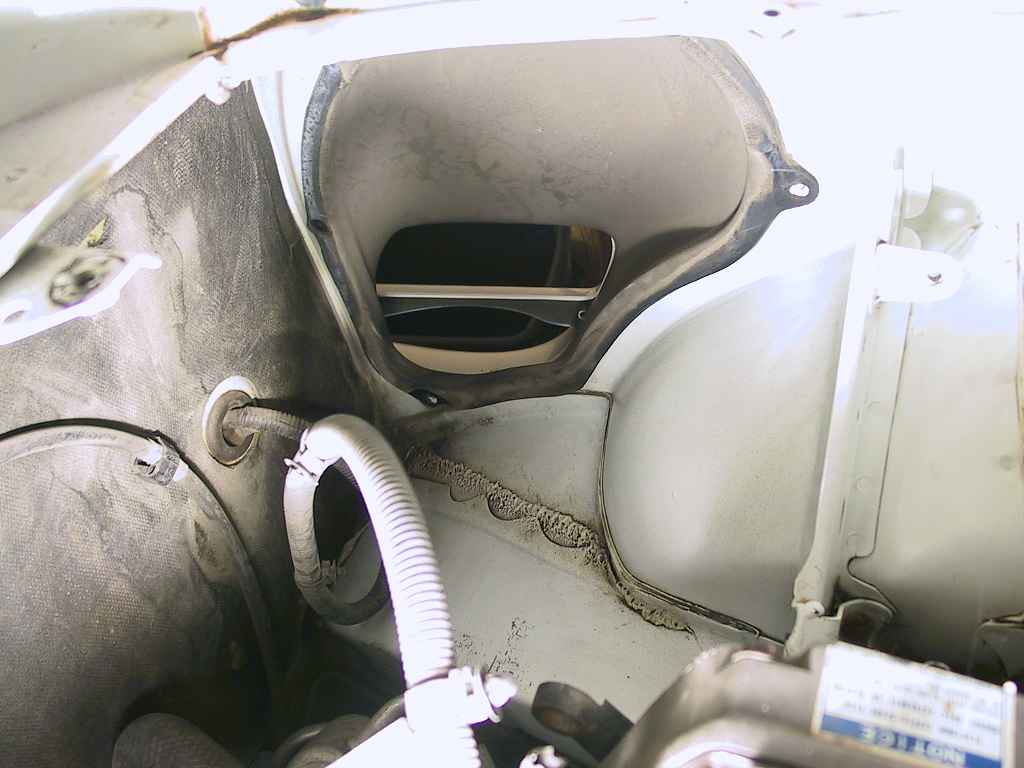
At any rate, here's what the engine bay looks like once the stock IC is
gone:
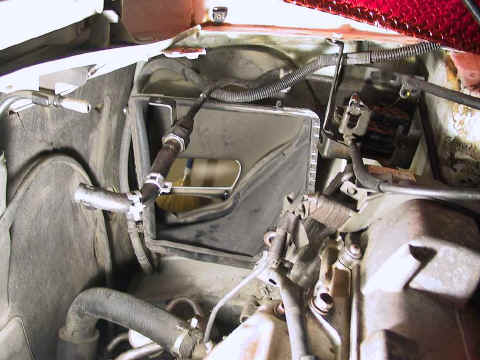
You may have noticed that I never removed the brake booster line entirely,
but I should have. It kept getting in the way.
|
|
|
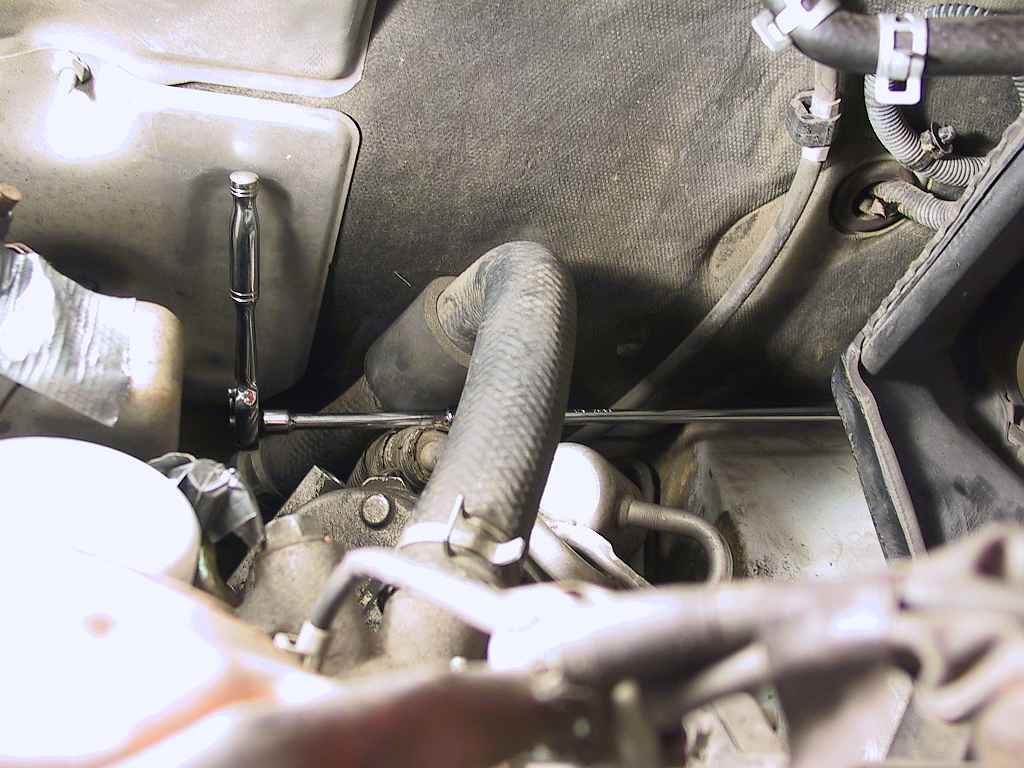
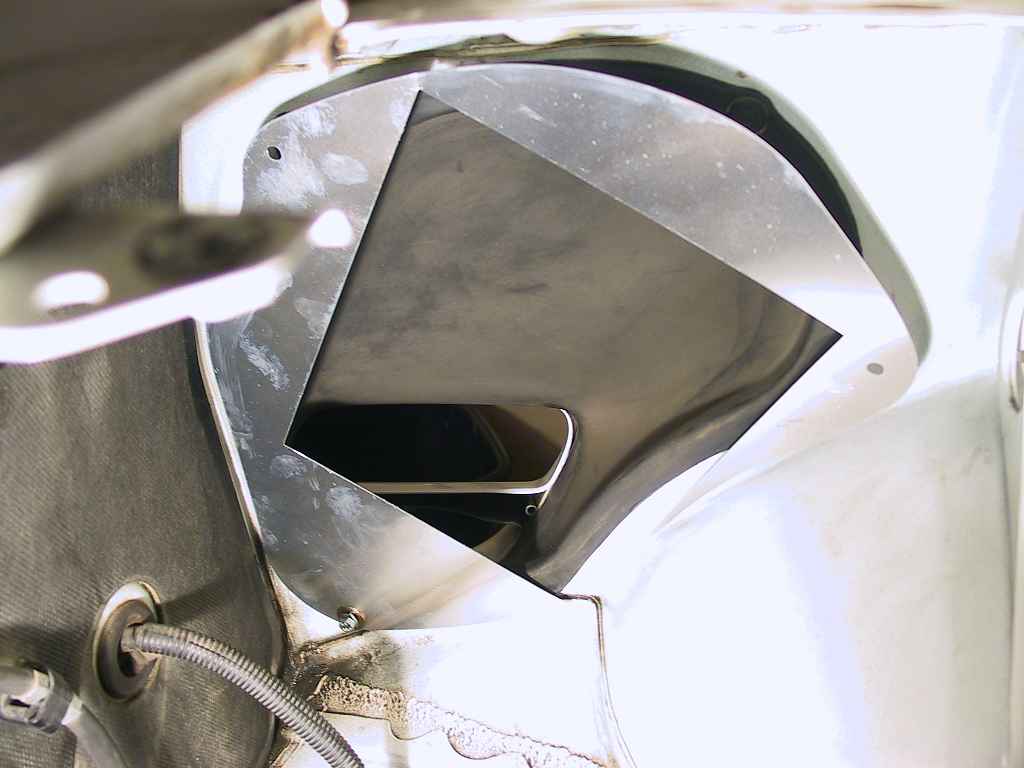
Next, you should remove the shroud, or
housing, that funnels air to the IC. There are three 10mm bolts. Two are
relatively easy to reach...
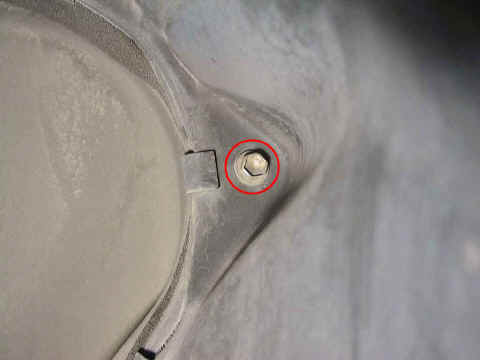
While the bottom bolt is obscured by the housing:

Once the bolts are out, the housing comes out easily.
|
|
|
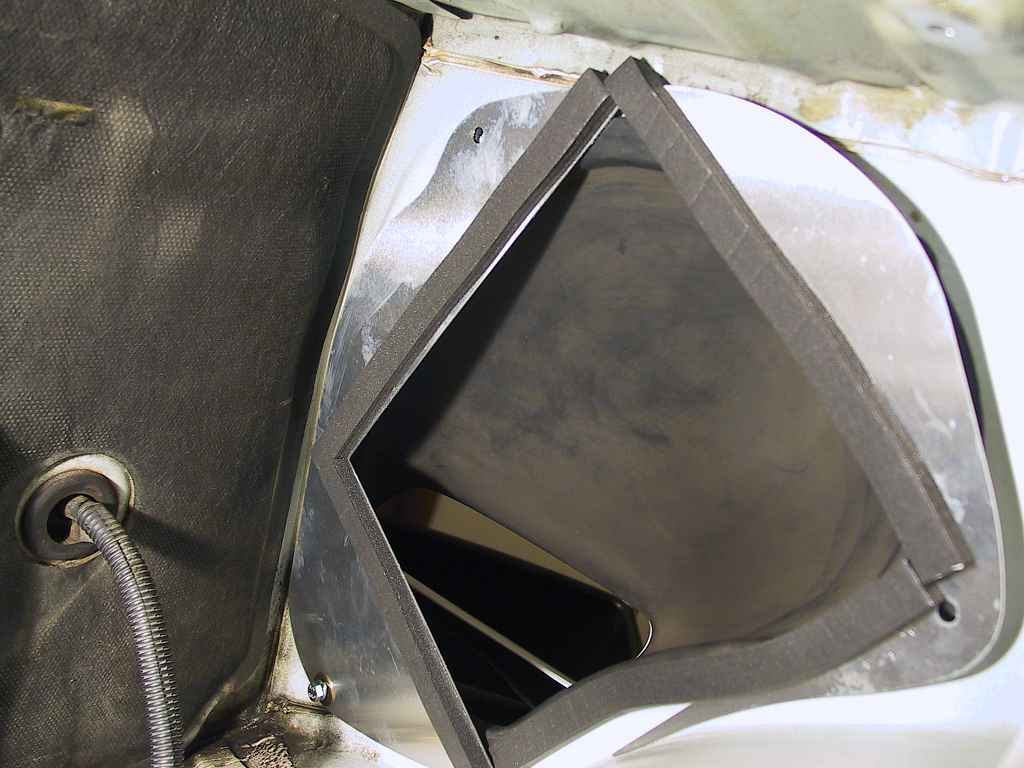
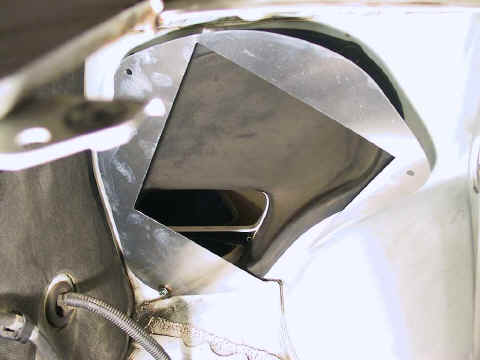
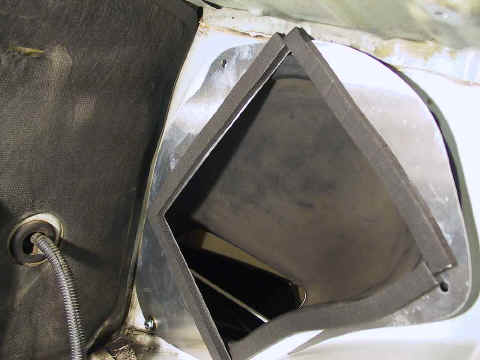
Once the housing was out, I took the
opportunity to remove some of the rustproofing gunk that was everywhere on
this car. Here's a shot of the opening prior to installing the new IC:

|
|
|
The first piece to install is the baffle
plate. My instructions say that I should install three studs, but there were
bolts in the package, not studs.
I installed the lower bolt loosely...
...then attached the foam tape:
|
|
|
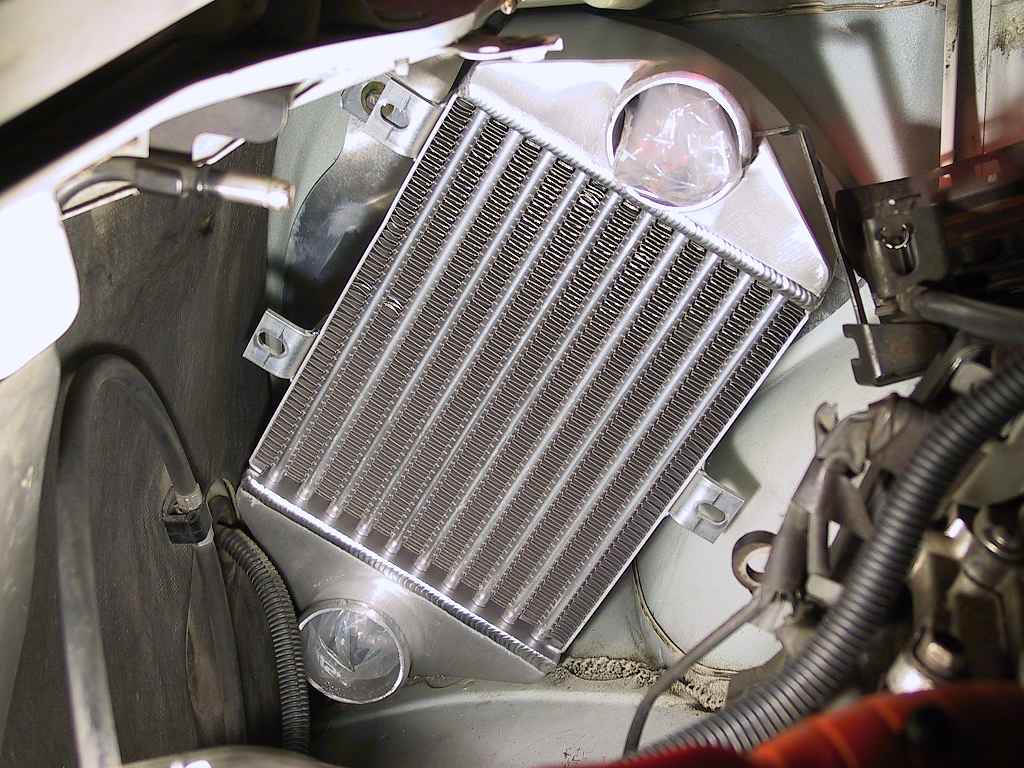
Next, I lined up the new intercooler with
the top bolt hole, and got that bolt threaded in a few turns. I was then able
to remove the lower bolt, re-insert it through the intercooler mount, and
thread it in a few turns. Finally, I got the last bolt started, and tightened
them all up:
|
|
|
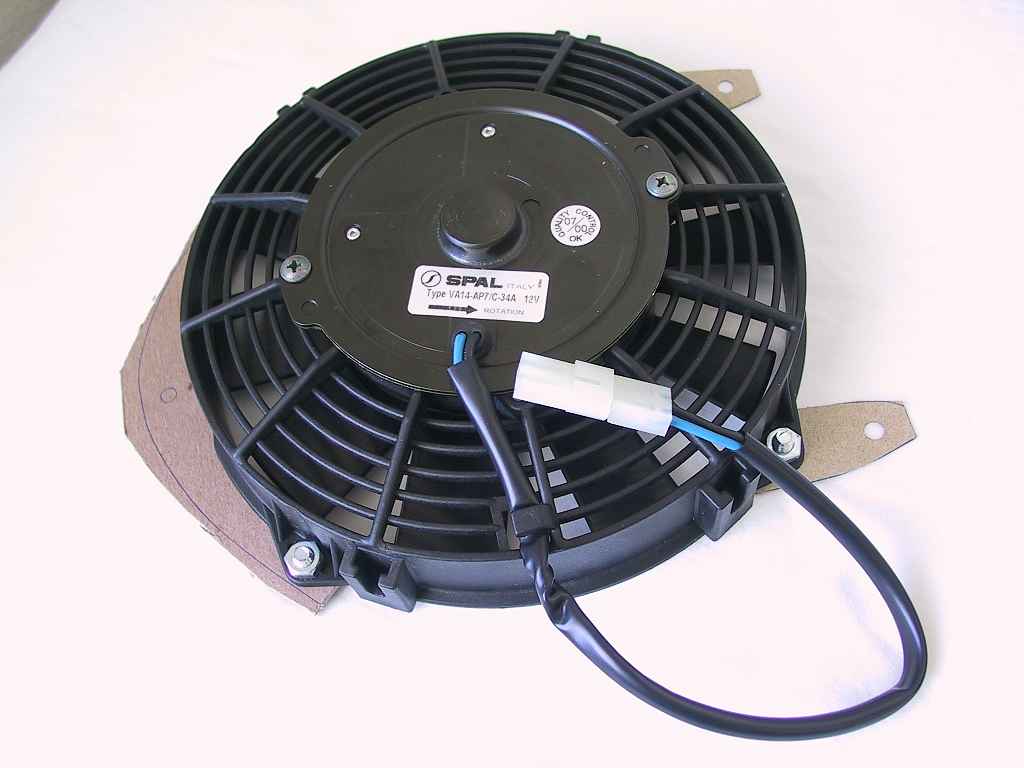
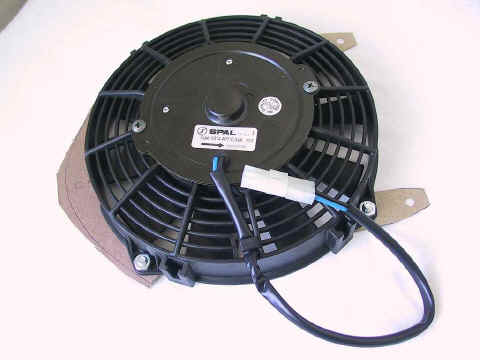
Now I was faced with mounting the SPAL fan,
which is a 7�" "puller" model. I wanted to keep the fan
slightly away from the surface of the IC, to help reduce the blockage
caused by the SPAL's massive hub area. I figured an inch or so of distance
would help quite a bit without causing the fan to get in the way of
anything.
My plan was to fabricate some aluminum
mounting brackets and space them out from the IC with rubber washers. The
first step was to make some templates out of pressboard, which is strong
enough to hold the weight of the fan as I measured and fine-tuned the
shapes. Here's a photo of my first attempt:
Since I was severely limited in what I could fabricate, I kept the design
simple. All I had to cut these out of .100" aluminum sheet was a hand
jig saw.
|
|
|
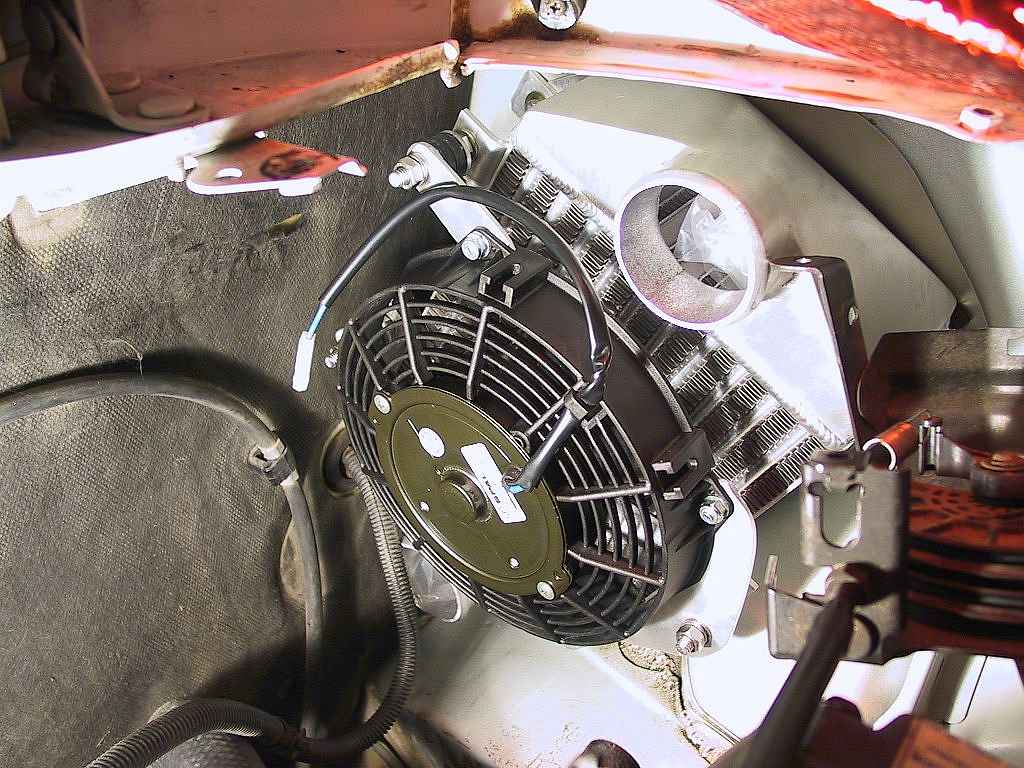
Once I had the design finalized, I cut out
the brackets, smoothed the edges a bit on the grinding wheel, and mounted
them to the fan.
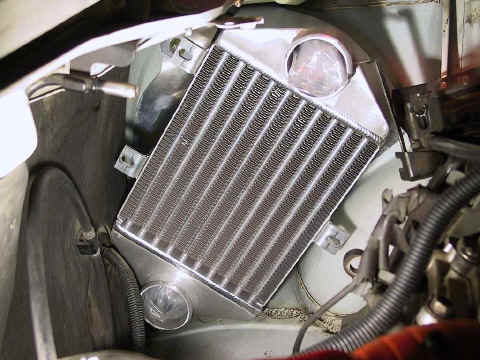
I then attached the brackets to the IC
mount points with 8mm x 40mm stainless bolts acting as studs. Here's a
shot of the installed fan:
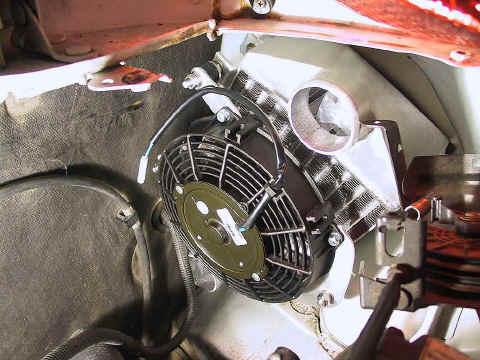
The fan is mounted about 1�" away from the face of the intercooler,
which seems to provide adequate airflow around the hub of the fan. A
custom-made duct would have been even better, but this was the compromise
I chose, given the availability of time and money
|
|
|
I replaced the electrical connector on the fan with a special Molex piece
that I found at McMaster-Carr. They call it a pin-and-socket connector,
and you can get these with any number of pins for the circuits. I like
them because they are strong (white nylon), keyed to avoid mis-matching
the wires, and they hold together well, yet can be easily
separated.
|
|
|
Once the fan was in, I began reassembly. The A/C compressor needs to be
reattached. However, do not tighten the mounting bolts yet. These need to
remain loose until the idler pulley is also reattached. You can install
the A/C hose clamp and tighten it to the body.
|
|
|
With the compressor in place, install the stiffening brace with its 14mm
bolts, and torque them down.
|
|
|
Reposition the idler pulley, and loosely attach the "short"
bolts. The long, lower bolt (under the coolant hose) goes through a collar
on the A/C compressor. I ended up using my bench grinder to put a slight
chamfer on the end of this bolt, as I was having a tough time getting it
started into the block. It's totally blind. If you have tightened up the
A/C compressor, your chances of getting this bolt started are very slight
indeed.
Once all the bolts are started, I tightened them down, then backed them
off to allow the bracket to be moved if necessary.
|
|
|
Back under the car, install the A/C drive belt. Torque down the
bolts on the A/C compressor. Reattach the underbody panel. You can
lower the car at this point.
|
|
|
Install the engine hanger bracket. Once it is in place, torque down the
idler pulley and engine hanger bolts.
|
|
|
Adjust the A/C drive belt tension to its designated setting. Tighten the
idler pulley lock bolt to the designated torque.
|
|
|
Reinstall the brake booster line.
|
|
|
Reinstall the throttle cable, and tighten the adjusting nut. Replace the
cover to the cable pulley.
|
|
|
|
|
|
Page
1
2
3
4
|
|
|
|
|