15 September, 2004
Rewiring Fog Lights on a '93 MR2
One of the mysteries of the '93 MR2 is why the fog lights only work with the
headlights turned on. If you've ever driven in heavy fog, you know that the
headlights only make things worse, and the fog lights are placed down low to
minimize the nasty reflections that make driving in fog so difficult.
Jeff Bihn, Marcus Hall, and Jeffrey Ho See have contributed suggestions to the MR2.COM archives that describe modifications to remedy this condition. Unfortunately, these are mostly text descriptions. I'm not very skilled when it comes to electrical mods, so photos are always appreciated in addition to text descriptions and/or schematics. Hopefully the photos I've included in this guide will help others who wish to make this modification.
Update
(07-16-2001)
Jesse Grice reports that this procedure also works on the 1992 MR2 (Thanks,
Jesse).
If
you wish to see the articles mentioned previously, they can be found here:
'91-'92 Fog Light
Modification
'94 Fog Light Modification
Finally, remember that this is only a guide -- not gospel. What you do to YOUR vehicle is YOUR responsibility. I do not endorse, approve, authorize, or otherwise encourage you to make alterations to your vehicle. Be careful, and recognize the dangers associated with modifications to your vehicle's critical systems, like electrical, engine, brakes, etc.
Please contact me if you have comments or suggestions about the article or the project, or if you find errors on these pages.
Tools
Needed
-
Needle-nose pliers
-
Small, flat blade screwdriver
-
10mm, 12mm sockets and/or wrenches
-
Wire cutters, strippers
-
Soldering iron, solder, electrical tape
Doing It
My goal was to modify the wiring to enable the fog
lights to run completely independently of the other lights. My only
concern is that they run unswitched, e.g., they run with the key in the
off position. It's more useful that way, but I hope I don't accidentally
leave them on some day and kill my battery. There is an indicator light
in the gauge cluster, but I'm not sure if that is enough for me. My
memory seems worse every day.
UPDATE: Ricky Benitez supplied a mod that
provides power only when the ignition is on, eliminating worries about
leaving the lights on and subsequently discharging the battery. More
about this further along in this guide.
Another decision is
whether to disconnect the battery while working on this modification. I
didn't, but it's probably prudent to do so, as you will be splicing
wires under the fuse panel.
On the right-hand side of the trunk is the fuse panel:

Notice in the lower right corner that the relay location for the fog light
is indicated by "FR FOG". Remove the cover of the fuse panel.
The red ovals indicate two areas (there are others not in the photo)
where you'll need to remove fasteners holding the retaining brackets for
the fuse panel. In my case, I also needed to remove the reinforcing brace,
a multi-armed brace that attaches in several places near the center of the
trunk. I'm not sure this is entirely necessary, but it made it easier to
work on the back of the fuse panel, and it enable me to clean out some
rustproofing "goop" that was sprayed everywhere.

Turn the fuse panel over, and remove the back cover. This is made more
complicated by the four clips that are used to retain the cover. To free
them, you need to work a small screwdriver in from the top and unlatch the
locking mechanism for each clip.
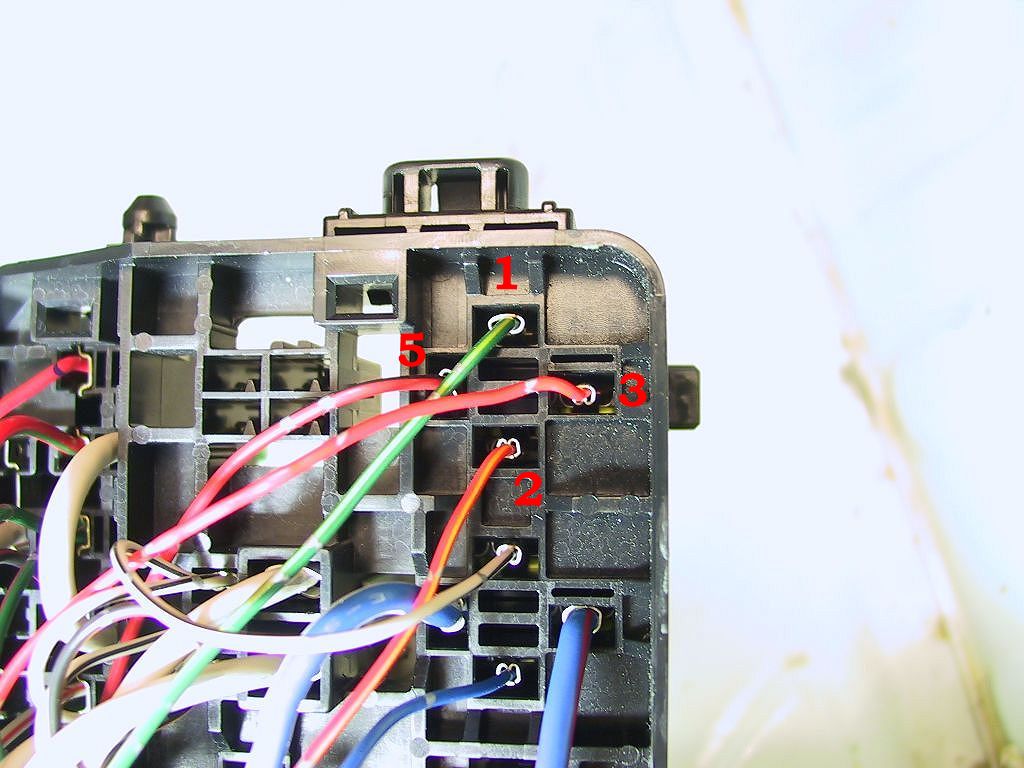
The photo focuses on the four wires leading to the fog light relay. I've numbered them according to the terminal numbers on the relay. The two wires we are interested in are #2 and #5.
Wire #2 (red w/yellow stripe) only receives power when the low-beam
headlights are powered on, so we need to remove that dependency. Luckily,
#5 is hot at all times. All we need to do is cut Wire #2 and splice it to
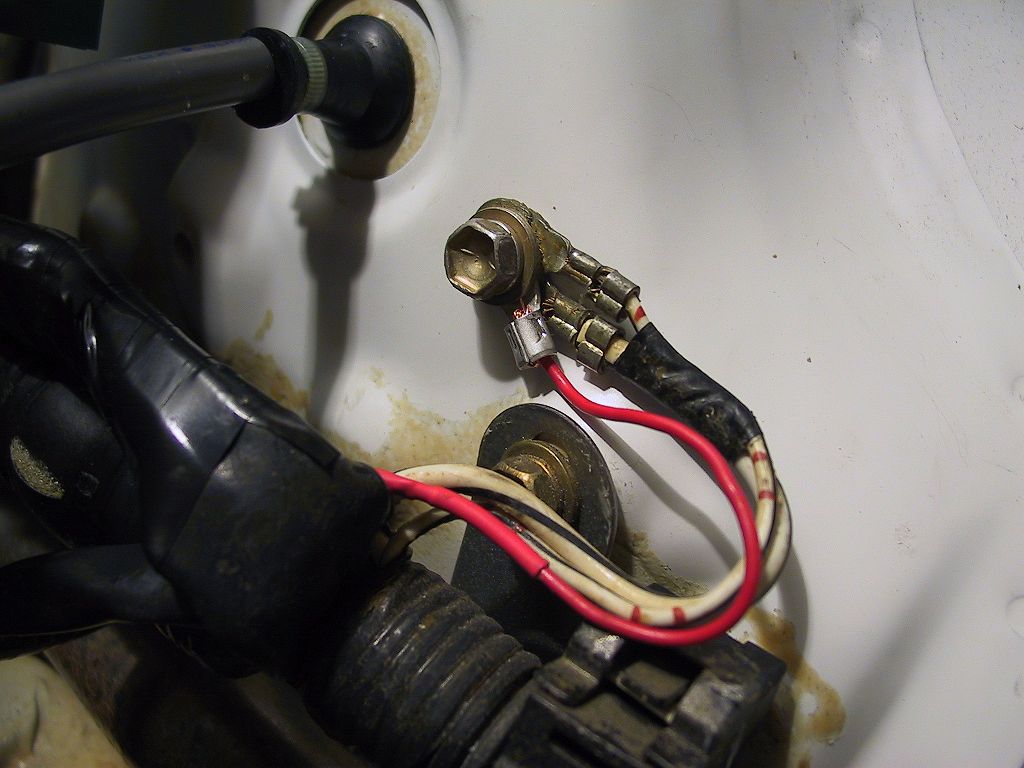
Wire #5, as shown below:
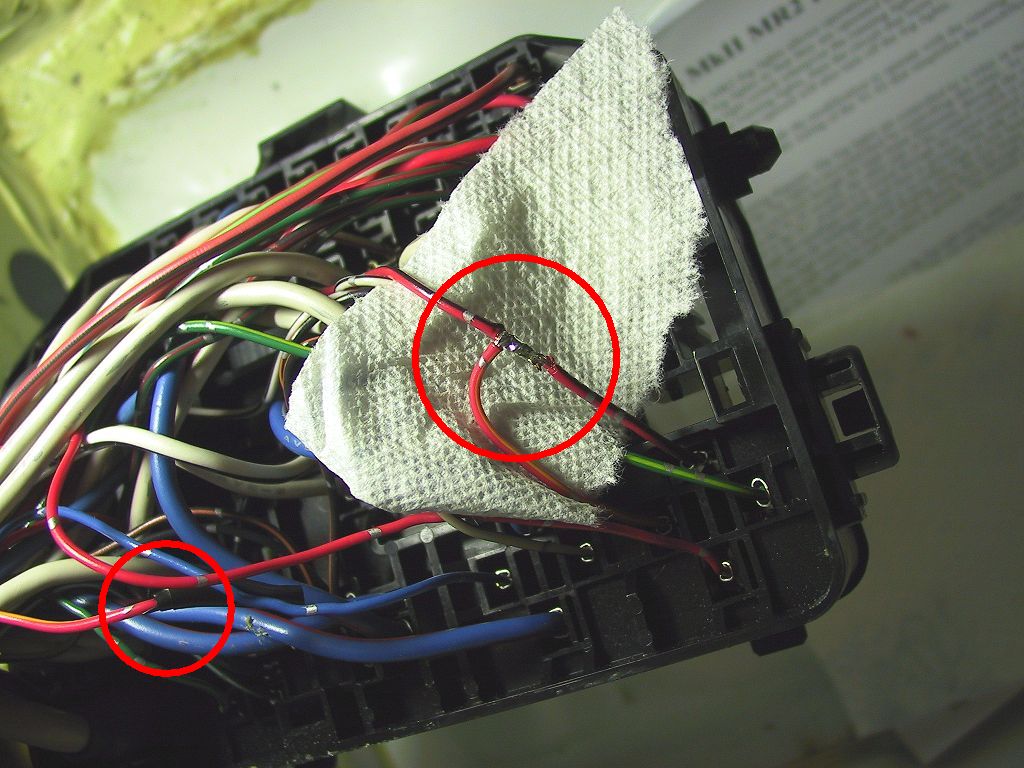
The larger red circle shows the finished soldered joint. The smaller red
circle shows where I've taped off the other end of Wire #2.
NOTE: Splicing Wire #2 into the black w/orange stripe wire (which goes to the FAN MAIN relay) instead of Wire #5 above will provide power only when the ignition is in the ON position, an excellent suggestion for preventing accidental battery discharge. Thanks go to Ricky Benitez at MRControls.com for this and numerous other MR2 tips.
After carefully taping the splice to prevent any shorts, you can replace the back cover, and re-mount the fuse panel in its original location. Replace the relay and you're ready to try it out......NOT!
Ah, yes, another Toyota mystery. All you seem to have accomplished is
that the fog lights will now come on even if the high beams are on. Not exactly
what I was looking for. I pored over the BGB's wiring diagram, but I got
lost until I re-read Marcus Hall's guide that mentions that
"some" MR2's run the ground wire over to the retract relay. This
must be the year. Why this is so complicated is a subject for discussion,
but another time. I'll avoid speculating and get on with the fix.
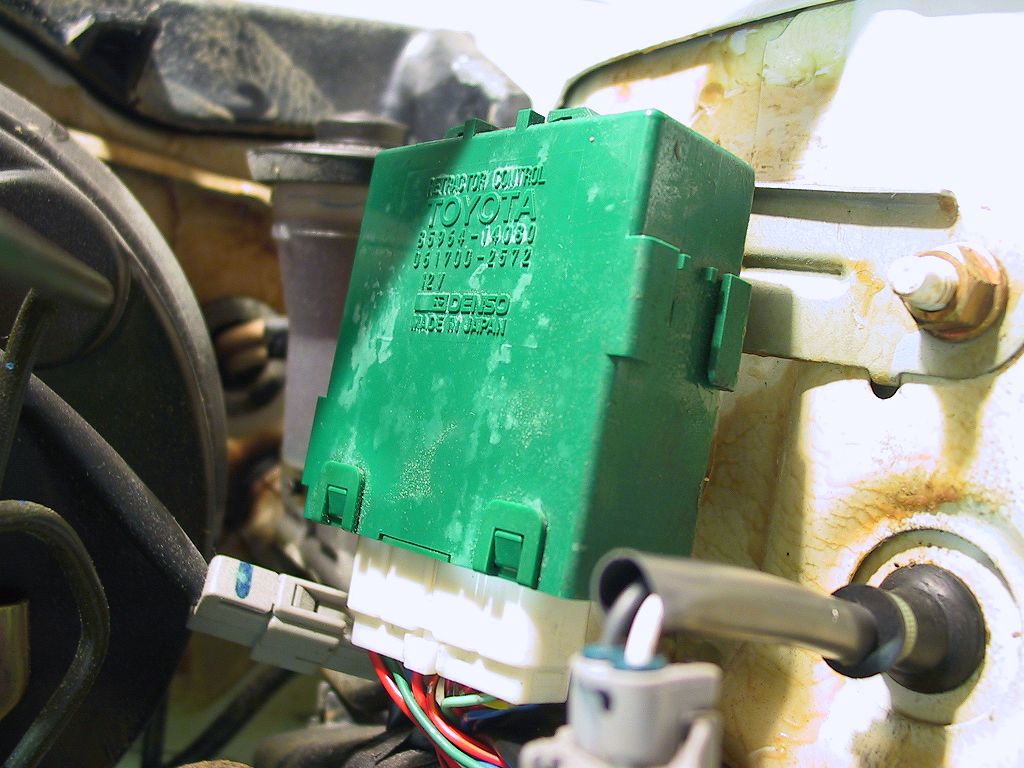
This is the retract relay, and your job is simple. Slide the relay off its mounting bracket, remove the connector from the bottom, and locate the only wire in the bundle that's red with a black stripe. It's the second wire in from one of the connector edges.
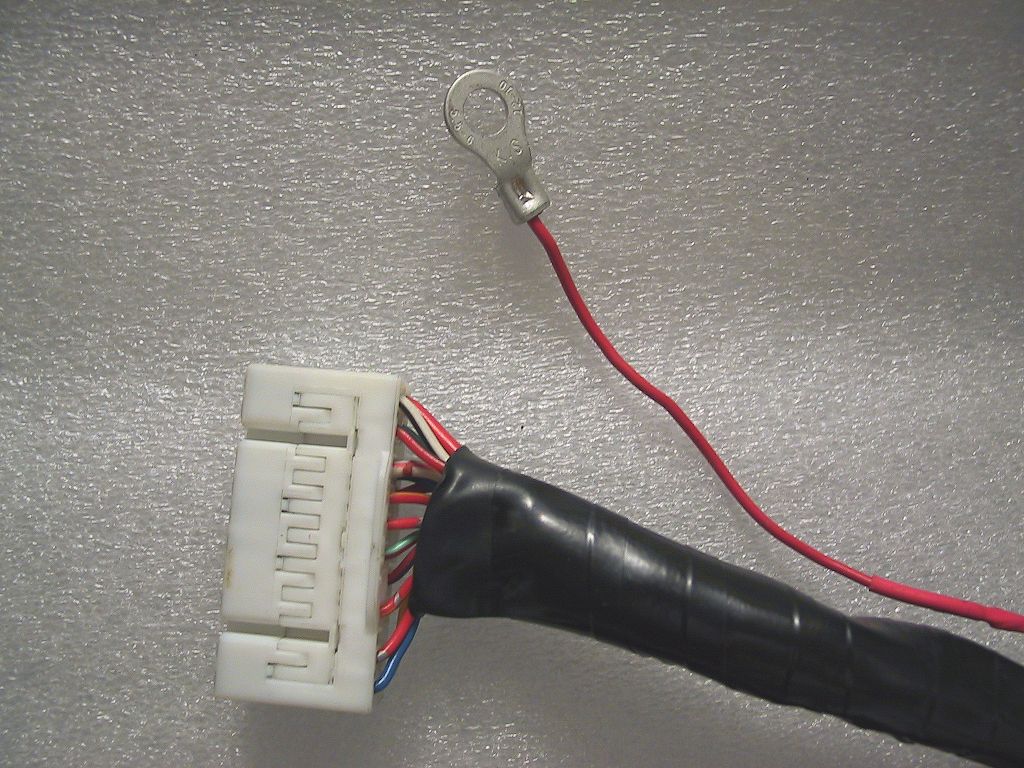
This solved the mystery, and now the fog lights are totally independent of the other lighting systems.
1993 MR2 Turbo