|
Page
 1
2
1
2
 |
|
|
MKII Door Trim Panel Removal
(continued)
|
|
|
|
|
|
Next, you'll need to remove the housing for the tweeter. You might be able
to simply pull this free from the top of the housing with your fingers, as
there's only one clip:
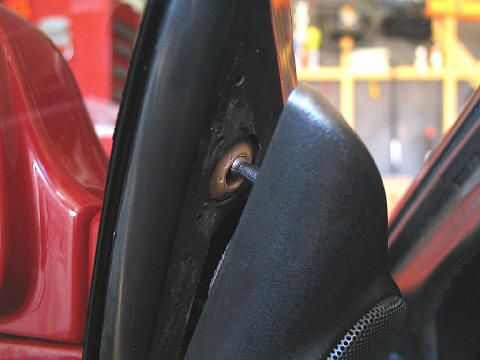
If it resists, use your flat-bladed tool to pry it free.
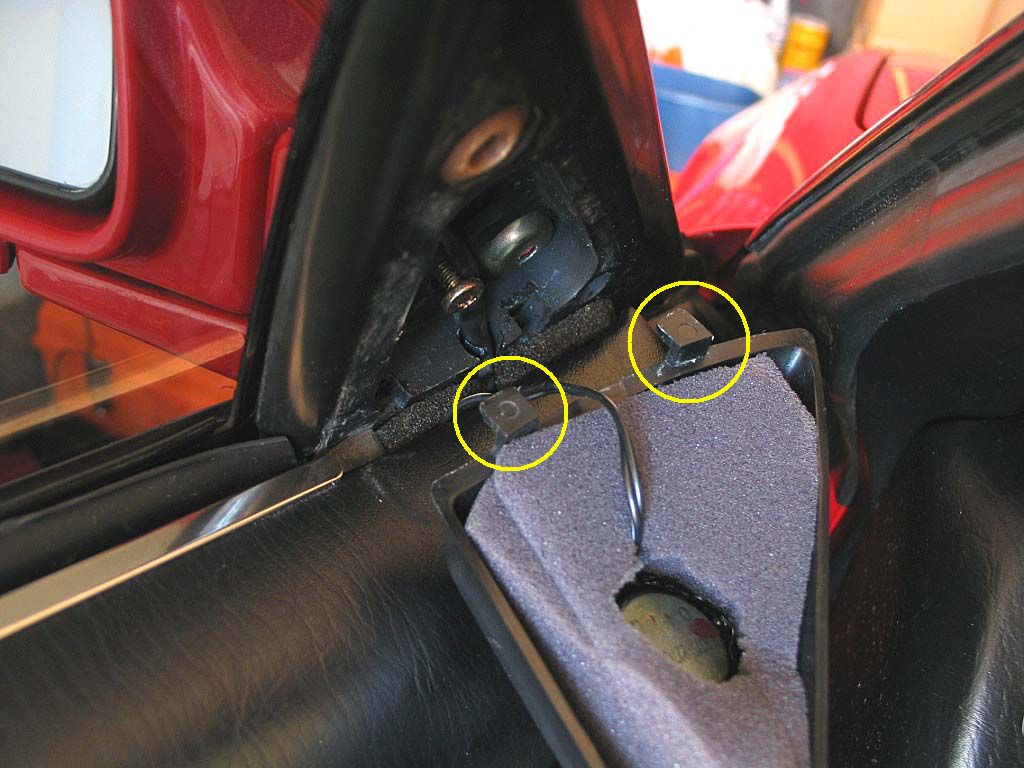
There are two hooked clips at the bottom, so lift the housing up and away
from the door panel once you've loosened the top clip:

I can't recall how much slack is available in the stock tweeter wiring, as
this is an aftermarket unit. You'll just need to move the tweeter out of
the way when you lift the door trim panel away from the door shell.
|
|
|
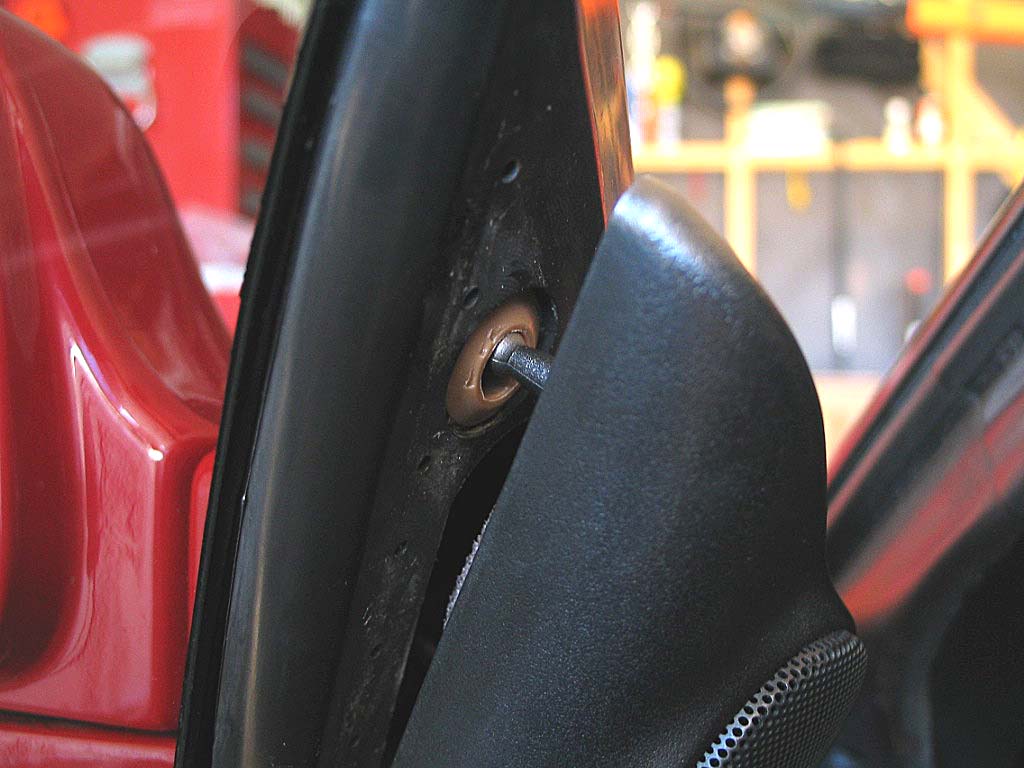
There are four Phillips screws left to remove. The first one is located
near the door post, just above the speaker housing:
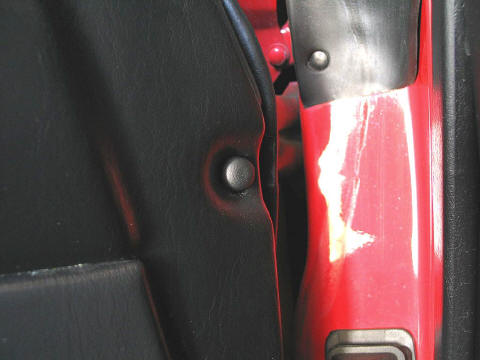
This screw is covered with a plastic cap. A small, flat-bladed screwdriver
can be used to pry the cap off. It might go flying, so be prepared to
catch it. Once the cap has been removed, removed the screw.
|
|
|
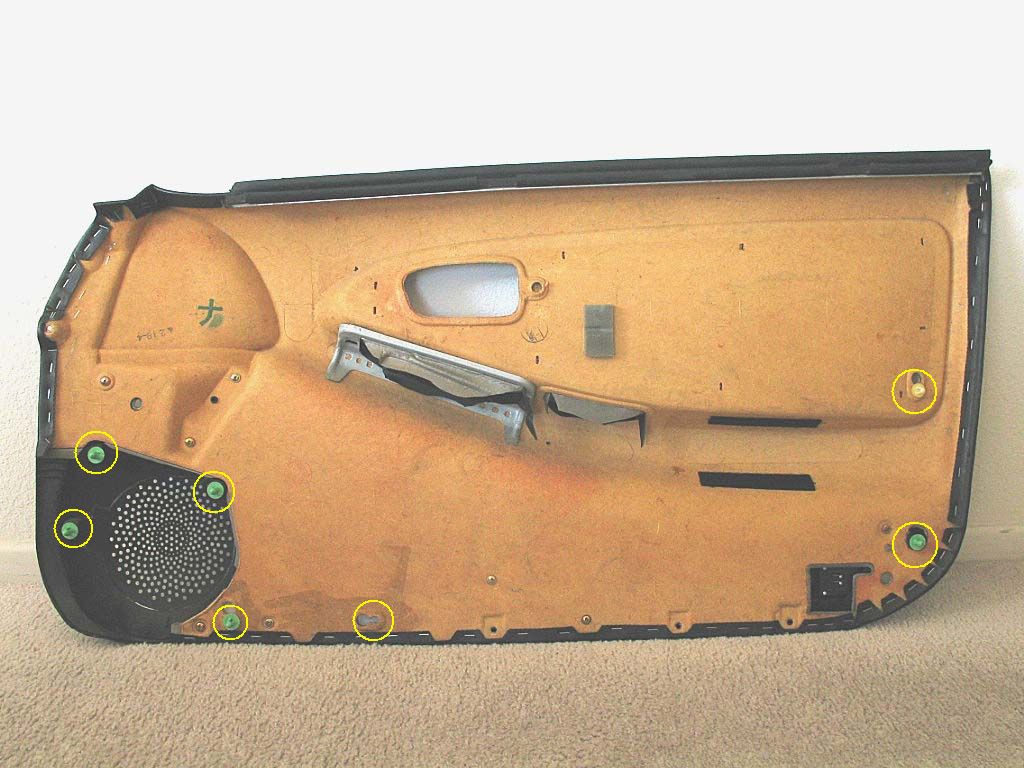
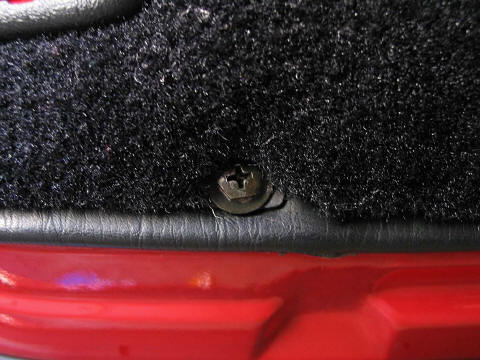
There are three Phillips screws at the bottom of the
trim panel. One is located directly below the strengthening rib in the
door pocket. The other two are located further out near the door opening.
They might be hard to see, but you can find them by feeling with your
fingers.
|
|
|
All that's holding the panel to the door shell now are several plastic
snap clips. Here's a photo of the clips and their positions:
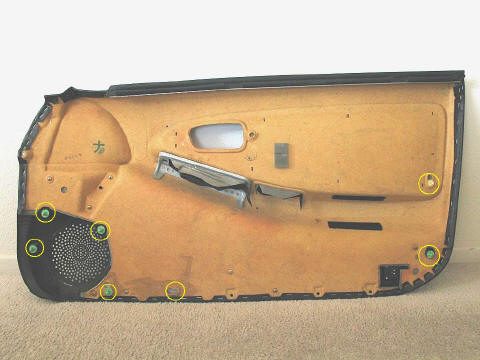
Note: One of the clips is missing in the photo.
Slip your hand in between the trim panel and the door shell at the
locations indicated in the photo above. Pull the trim panel towards you,
firmly but gently. Don't jerk it, as you can damage the panel. The snap
clips should break free. The trim panel won't fall off, as it is hinged
on the top of the door at the window sill.
|
|
|
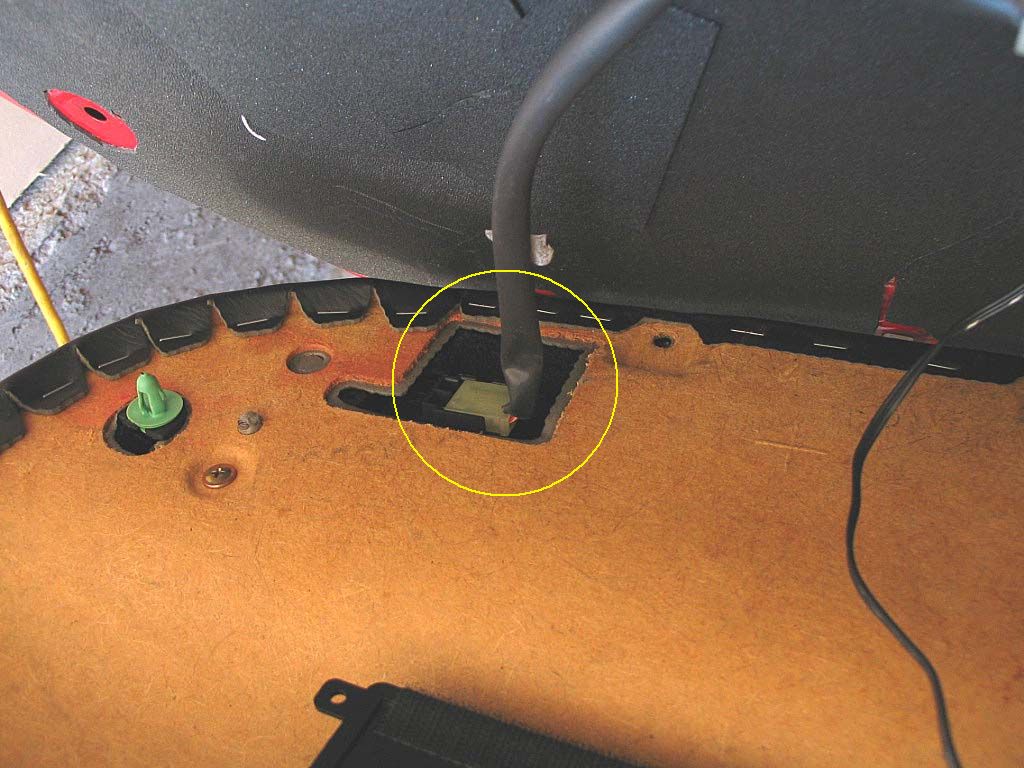
With the panel slightly pulled out from the door shell, you'll need to
disconnect one remaining electrical connection -- the wire to the courtesy light
along the lower edge of the trim panel:

There's a locking clip along one edge of the connector that needs to be pressed
in to release, but it's a fairly easy removal (unlike many of the MR2's
electrical connections).
|
|
|
With the courtesy light disconnected, pull the trim panel slightly away
from the door shell to keep the snap clips free, then lift the entire
panel straight up and away from the door shell. You might need to slowly
work it free if it's never been removed, but there are no fasteners
remaining -- it's just friction at this point. Be sure to keep the tweeter
housing out of the way as you remove the panel.
|
|
|
Once the trim panel is removed, inspect it for the door clips, as
sometimes they remain on the door shell.
|
|
|
When reinstalling the panel, be careful not to damage the front speaker
with one of the exposed plastic snap clips. It's not much of a problem
with the stock speakers, but aftermarket speakers tend to stick out a bit
more, and can be easily punctured. |
|
|
|
|
|
|
|
|
Page
1
2
|
|
|
|
|